
Mestia to Ushguli 4-Day Hike: Route, Homestays, Packing List
Mestia to Ushguli is a popular hut-to-hut trek in the Svaneti region of Georgia. I’d wanted to hike in Georgia for 8 years, and this seemed like the perfect mix of beautiful snow-capped mountains, cozy homestays, and challenging days while being a manageable distance.
Here’s everything you should know before you hike, including a day-by-day breakdown, homestays, packing list, and stats.
This post contains affiliate links, meaning I may earn a small commission on any purchases or bookings through those links.
Mestia to Ushguli FAQs
How long is the Mestia to Ushguli hike?
The traditional route is 36mi/58km with 10,000ft/3050m gain. It takes 4 days and 3 nights to complete. The route via Tsvirmi is 42mi/68km with 11,600ft/3540m gain over the same number of days. My friend Porter and I did the route via Tsvirmi and I would recommend it to stop by a cute mountain cafe and get better views. (Just make sure to not take the ski lift and follow the road on Day 1. See this track for the route we took instead of the lift).
Where do you stay? How far in advance to book?
There are homestays in each village, so you get hot showers and stay in real beds. There’s wifi as well. I would book at least a month in advance, if not two. Sometimes homestays get fully booked and you might have to stay in an alternate village.
How much does everything cost?
For just a room at a homestay for 2 people, it costs around $35 USD or 90 Georgian lari total. For meals, it’s an additional 35USD/90 lari or so total. I’d say we spent around 170-200 lari per night for the two of us. Then we spent around 50-60 lari on snack stops. You need to make sure to have enough cash the whole time as there are no ATMs. We ended up Venmoing an American to ensure we had enough cash for the rest of the trip.
What about dietary restrictions?
I ate vegetarian and everything was fine. I messaged the hosts beforehand, and you should also remind them when you arrive. While I normally eat plant-based, I worried that the food wouldn’t be calorie dense if I told them vegan. I already felt like some of the meals lacked protein for vegetarians, as sometimes it was just the same meal without the meat. I would pack your own food if you’re vegan or gluten-free as the meals are dairy- and bread-heavy.
Where do you leave your luggage?
Most homestays in Mestia let you leave your extra luggage if you’re returning to stay with them. Our homestay was at the top of a hill and more rustic, so I wouldn’t recommend it, but Guesthouse Mountain View looks much nicer and a review mentions that they could leave their luggage.
When is the best time to go?
We went in mid-August and it was perfect. There were flowers blooming, the weather was sunny but not too hot, and the nights were cool but not freezing. I’d say anytime from July to September is probably ideal.
How do you get back from Ushguli?
There are marshrutkas, or shared vans, that just wait to fill up in Ushguli. Expect to pay ~50 lari. If you pre-book a ride it can be around 40 lari, but you have to hike further up into the city.
Is the Mestia to Ushguli trek hard?
Yes, but it’s a great trek for beginners in good shape. It’s not too long, the homestays are comfortable, and you don’t need very technical hiking gear. I didn’t even bring a hiking backpack—just my regular travel backpack. You should expect to be sore, but as long as you’re generally active, the trek is very doable.
Mestia to Ushguli Route
Day 0: Mestia
You’ll want to have a day of rest before starting the trek. You can take marshrutkas from major cities, including Tbilisi, Kutaisi, and Batumi. We started our time in Georgia in Tbilisi, spent a night in Kutaisi, and then took the van to Mestia. It takes around 6 hours with a couple breaks in the middle.
- Accommodation: Guesthouse Mountain View
Day 1: Mestia to Tsvirmi
- Stats: 12.6mi/20.3km, 4110ft/1250m gain, 2860ft/879m loss
- Accommodation: Shorena’s Homestay
- If you go to Zhabeshi instead, you can stay at Guest House Gogia
Day 2: Tsvirmi to Adishi
- Stats: 10.6mi/17km, 3110ft/950m gain, 2390ft/730m loss
- Accommodation: Guest House BETQIL (link may deactivate during the off season). Also try Lento Kaldani Guesthouse.
Day 3: Adishi to Iprali
- Stats: 11mi/17.7km, 2380ft/725m gain, 2830ft/860m loss
- Accommodation: Guest House Betegi
Day 4: Iprali to Ushguli
- Stats: 7.7mi/12.4km, 1950ft/590m gain, 1580ft/480m loss
- Accommodation: Back to Mestia’s Guesthouse Mountain View
Mestia to Ushguli via Tsvirmi Day-by-Day Breakdown
Day 1: Mestia to Tsvirmi
- Stats: 12.6mi/20.3km, 4110ft/1250m gain, 2860ft/879m loss
- Accommodation: Shorena’s Homestay
- If you go to Zhabeshi instead, you can stay at Guest House Gogia
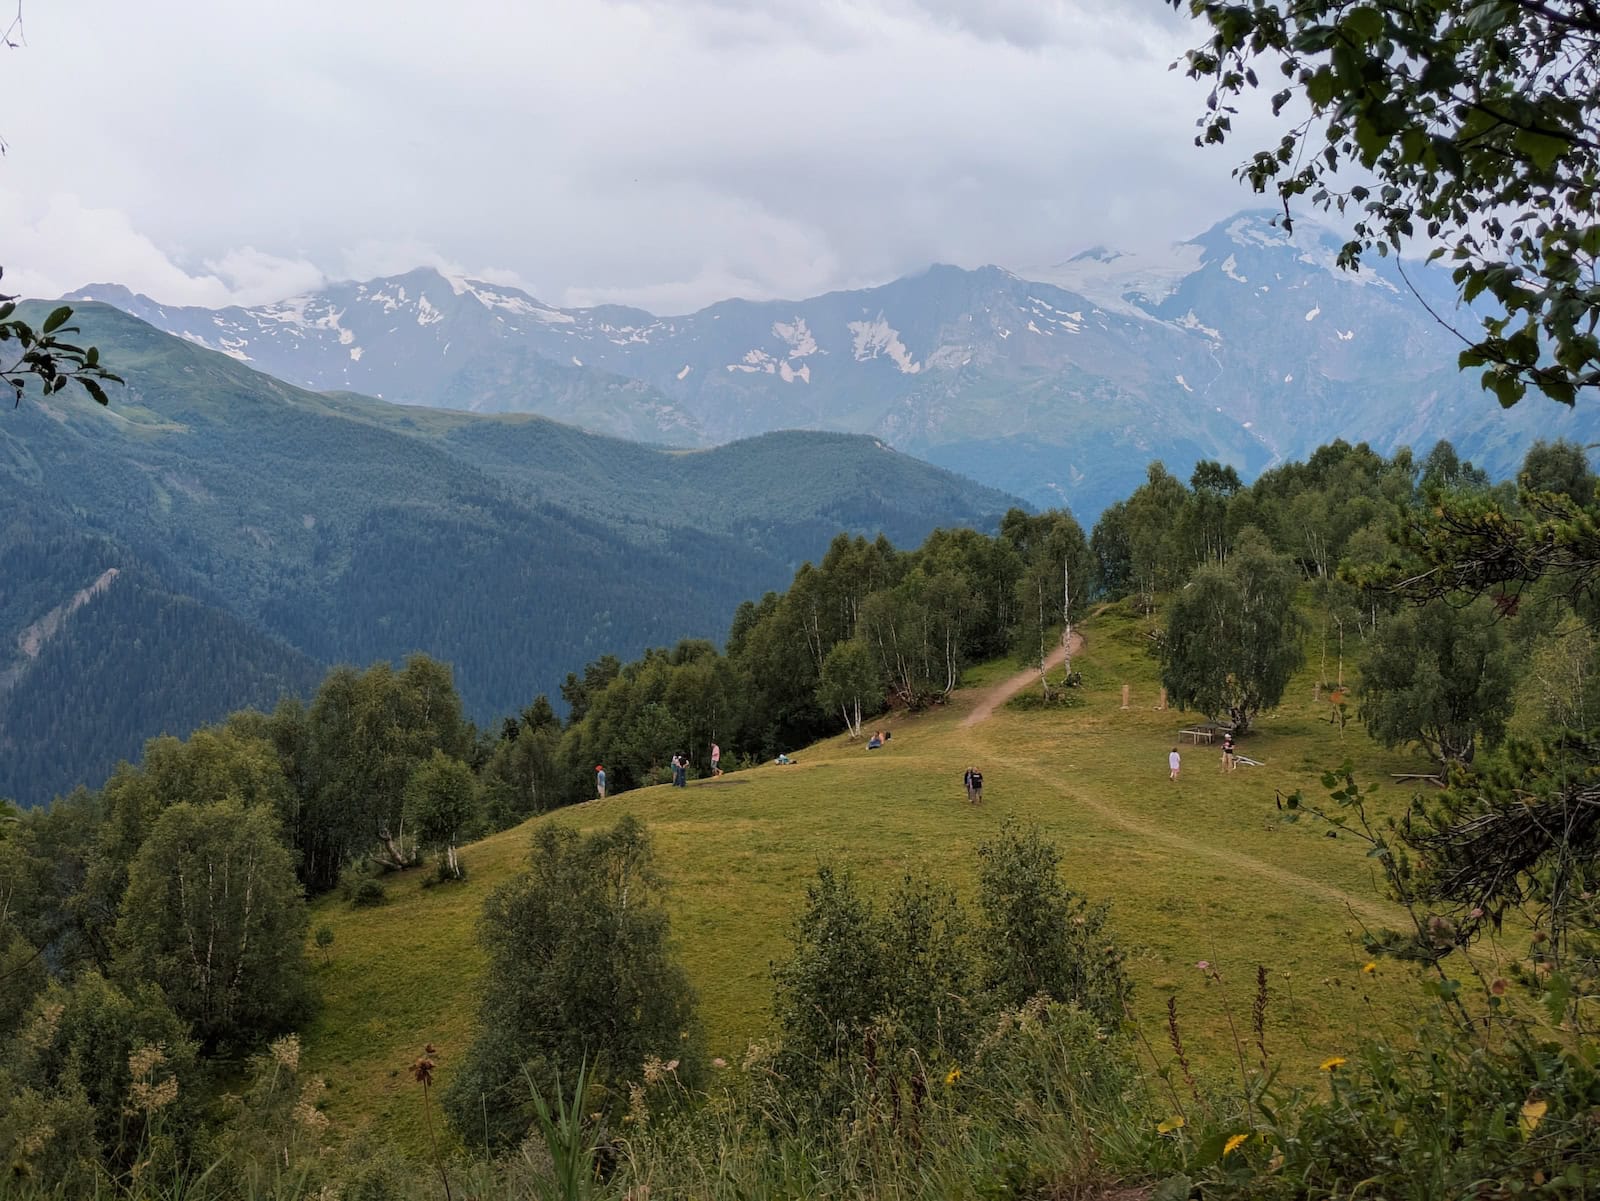
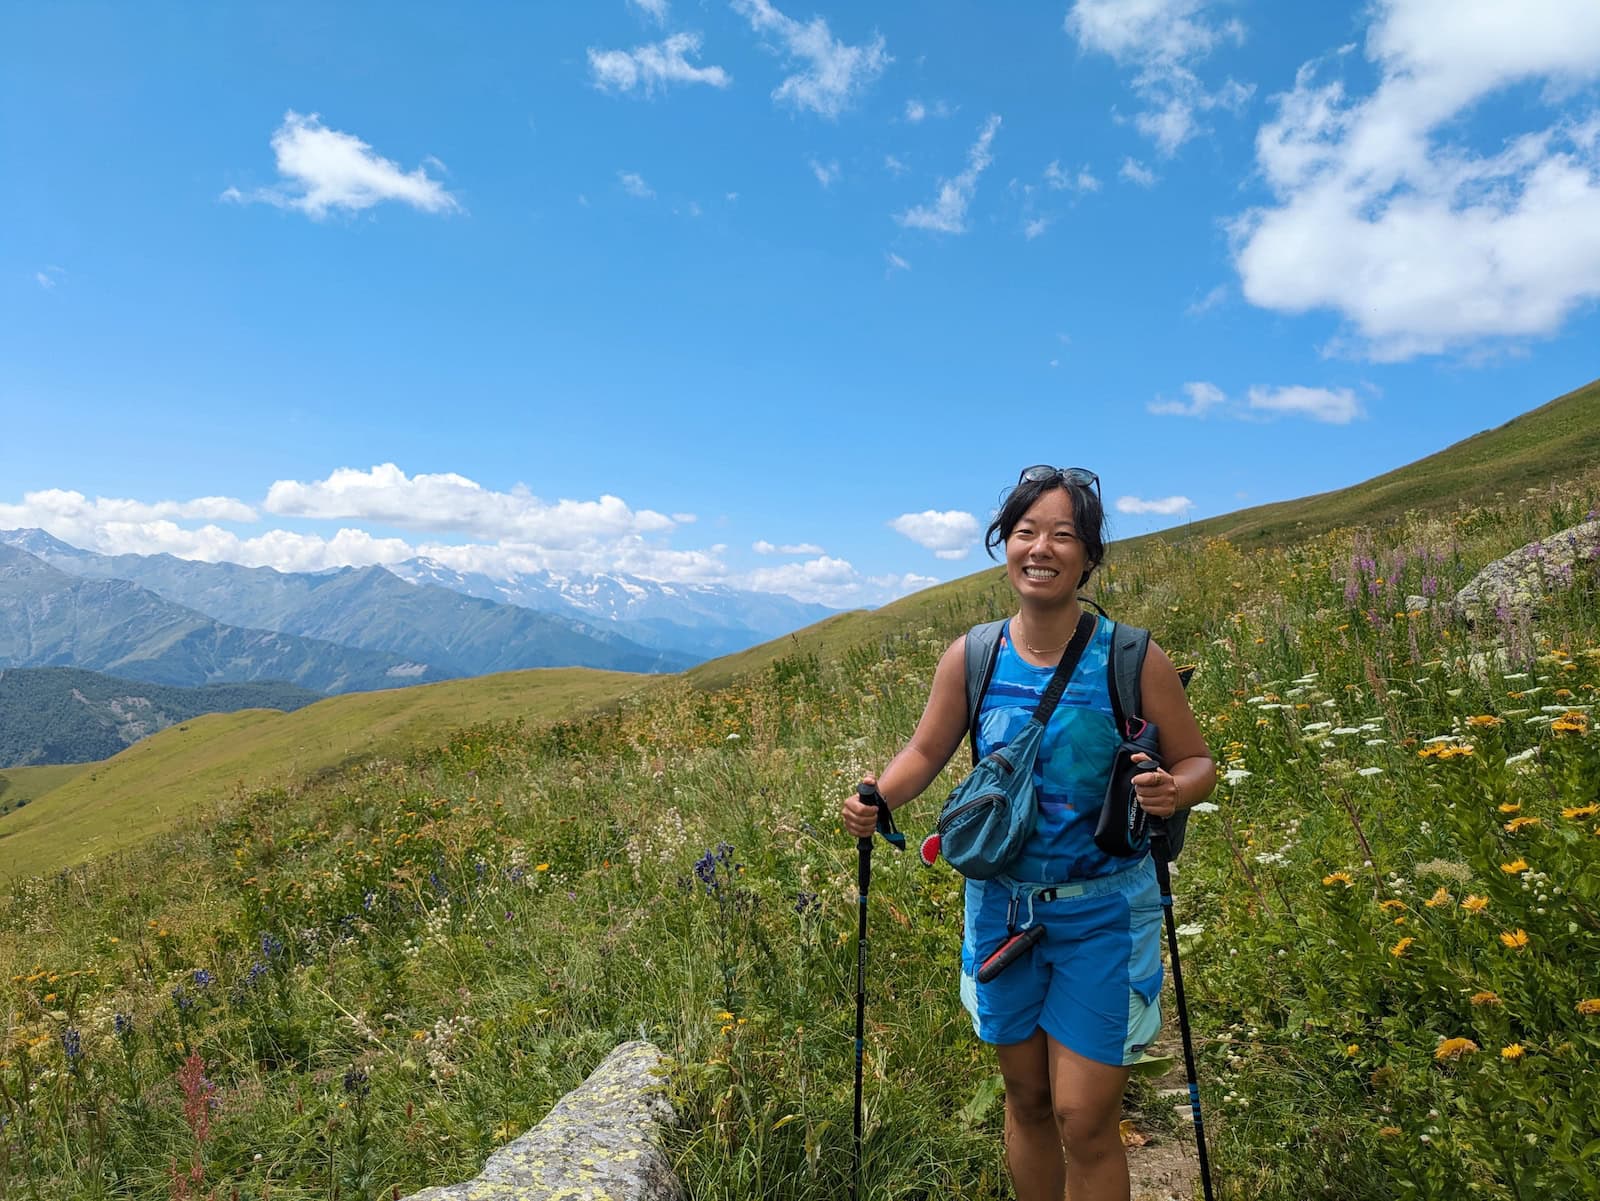
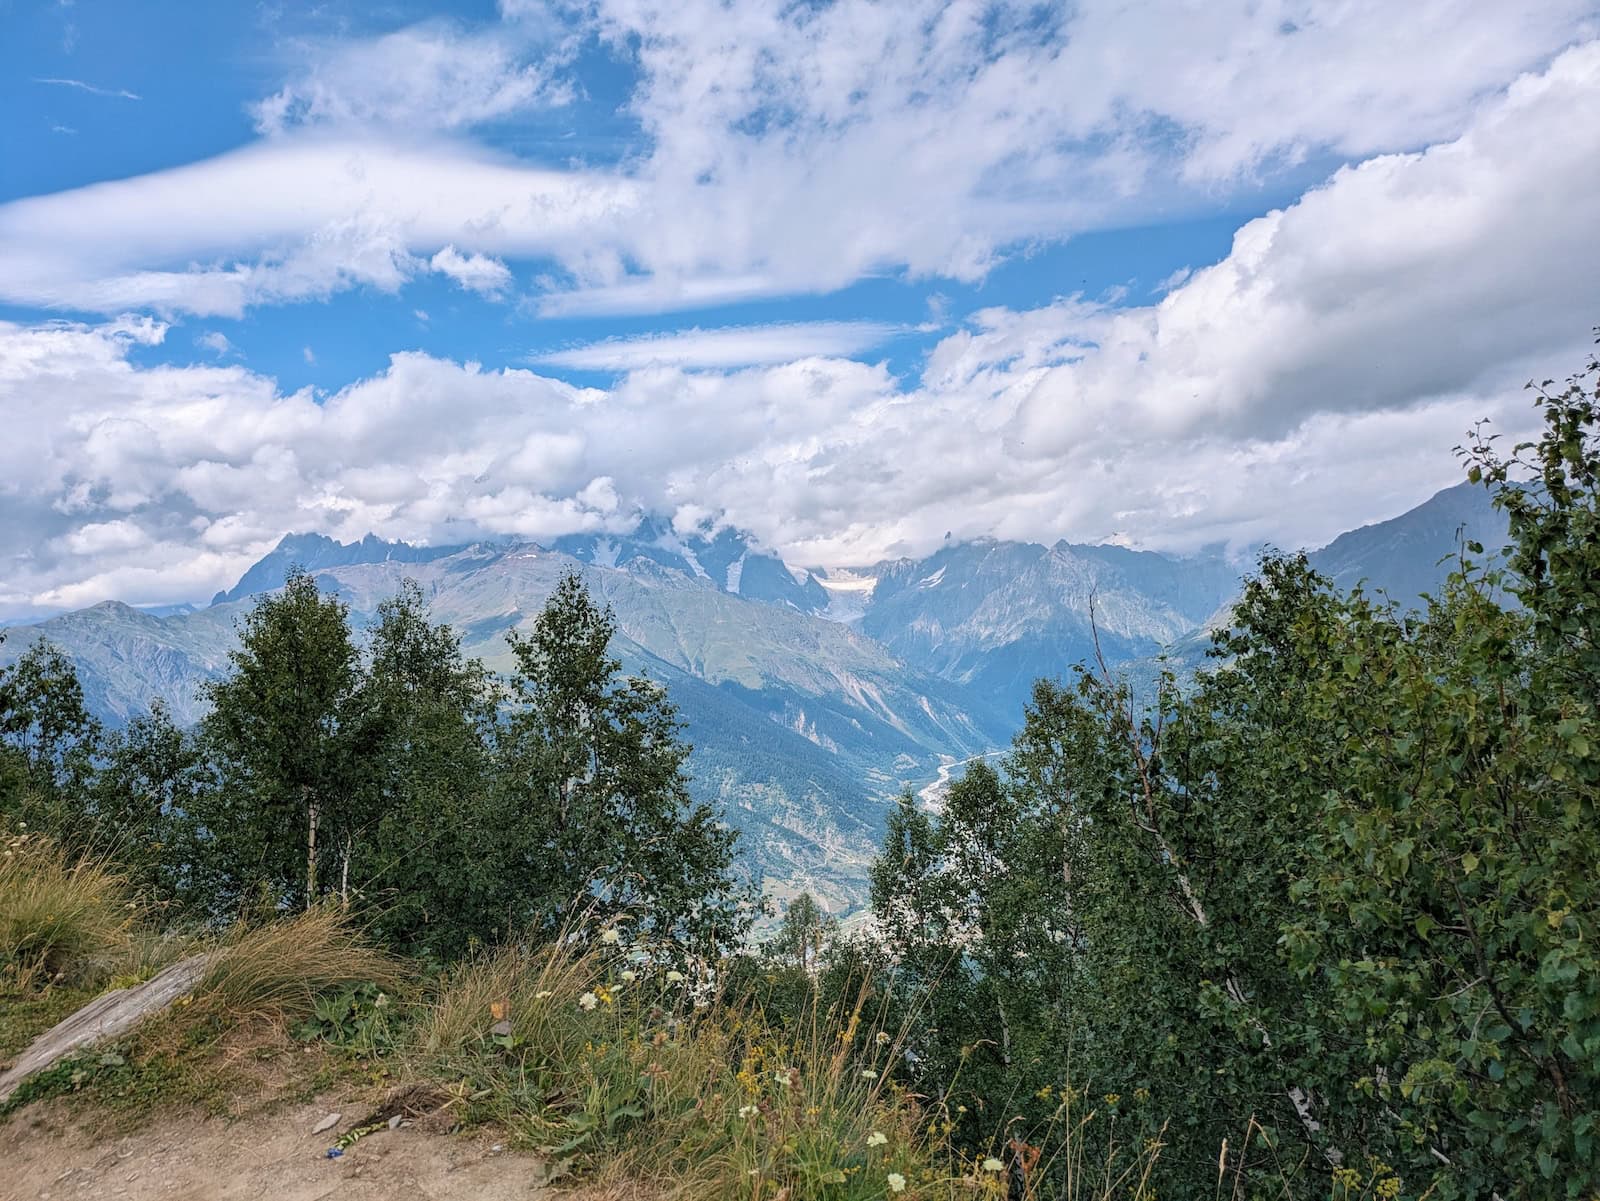
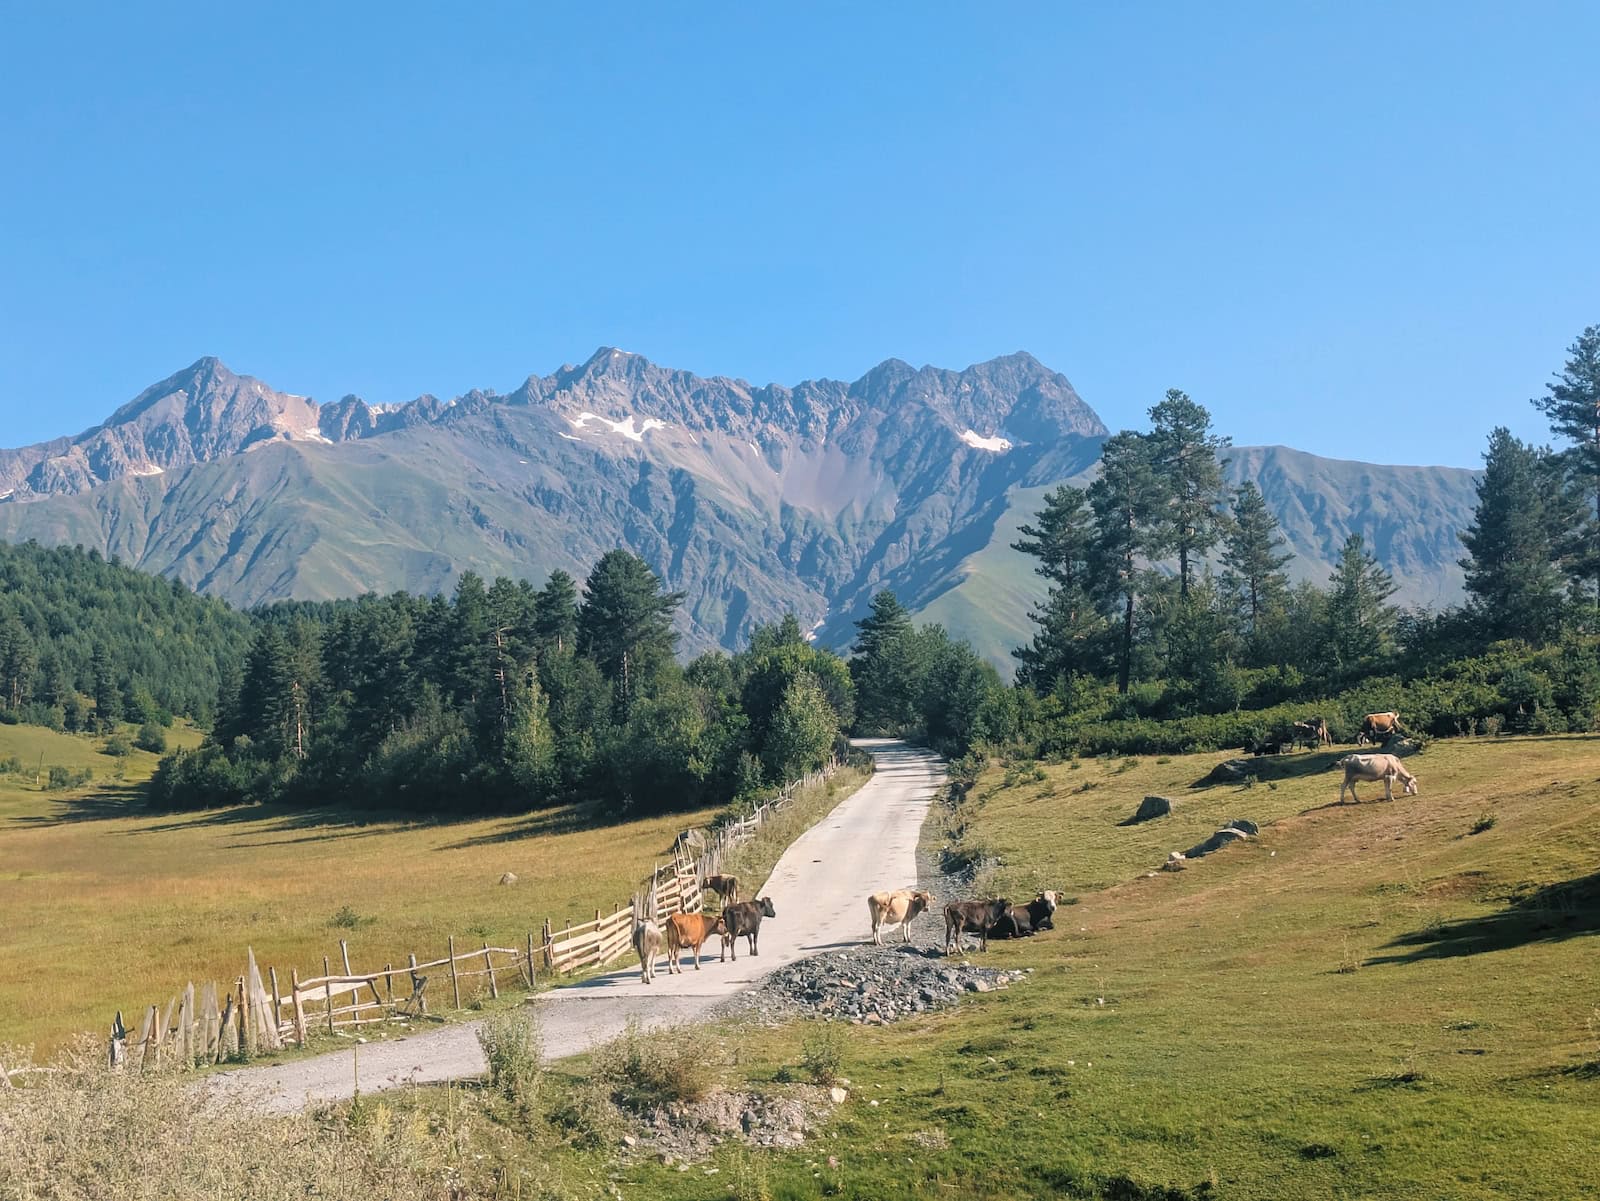
The hike started from the town of Mestia and was extremely confusing as soon as we hit the forest. We got lost several times and had to claw our way through some bushes since it looked like the trail didn’t exist in spots. This is likely because the route through Zhabeshi is more popular, and many people take the ski lift if they do have to hike to the peak of Hatsvali Mountain. I would consider following the road instead of the trail in the beginning.
We walked right past the ski lift, but it was still closed at the time (it opens at 11am). In the beginning, I seriously regretted not waiting for the lift since the path was so chaotic. On top of that, we eventually hit the road and had to follow it for a couple miles, and the scenery wasn’t that interesting.
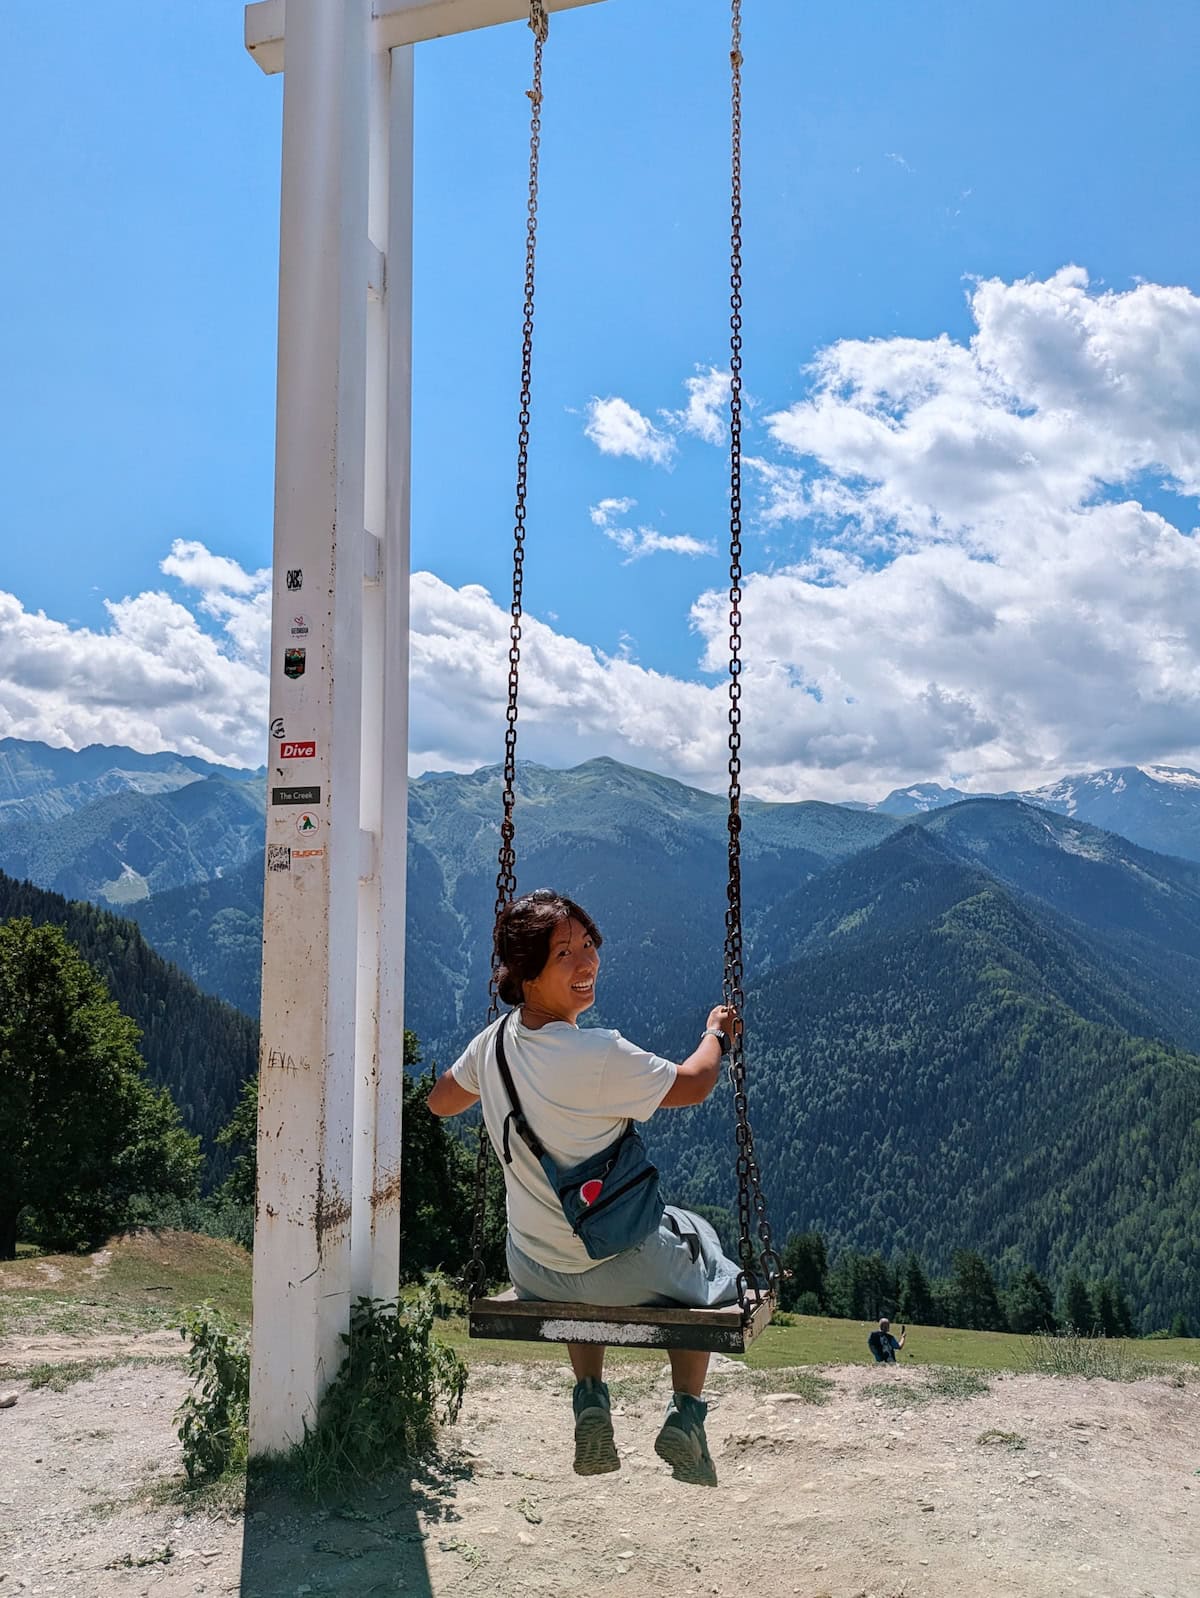
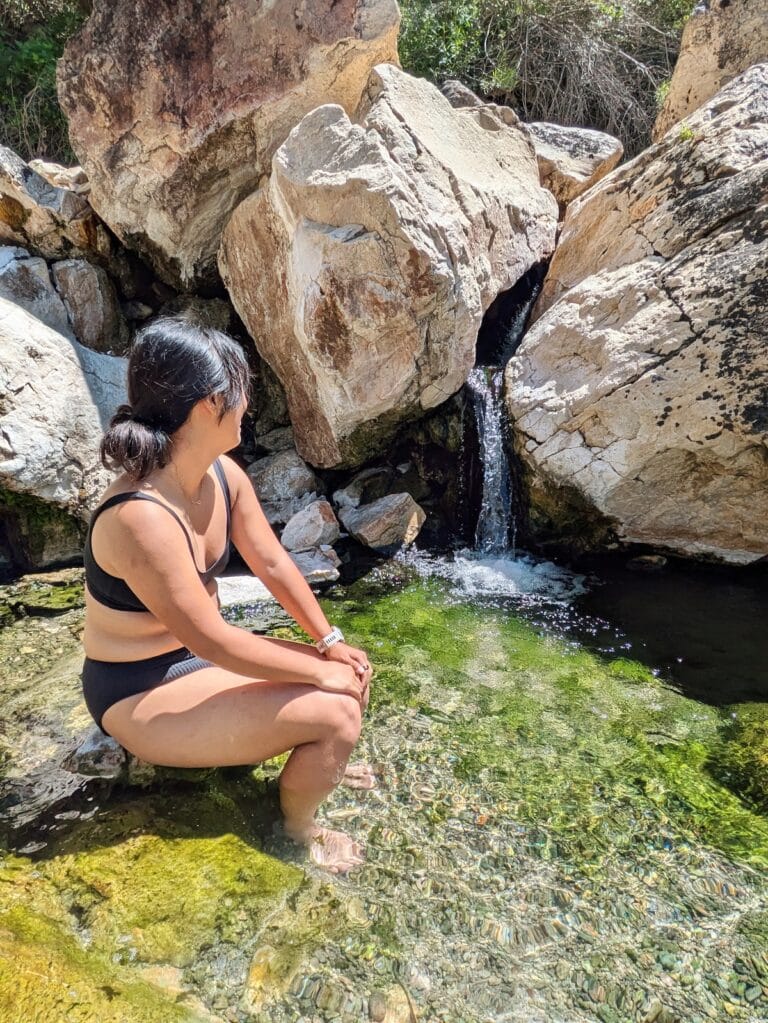
But, we found lots of wild raspberries along the way, and ended up passing by a cute mountain cafe and Instagram-famous swing at Heshkili Huts. This was the perfect spot for a break, and my friend Porter ordered herbal tea (collected fresh from the mountains!) and I had a Georgian lemonade. We also got some Instagram shots of course :)
From there, we marched through the forest to reach the peak of Hatsvali. This was the first time we saw groups of other hikers all day. The views here were lovely all around. We befriended a mountain dog who walked with us for a few hours before joining another pair.
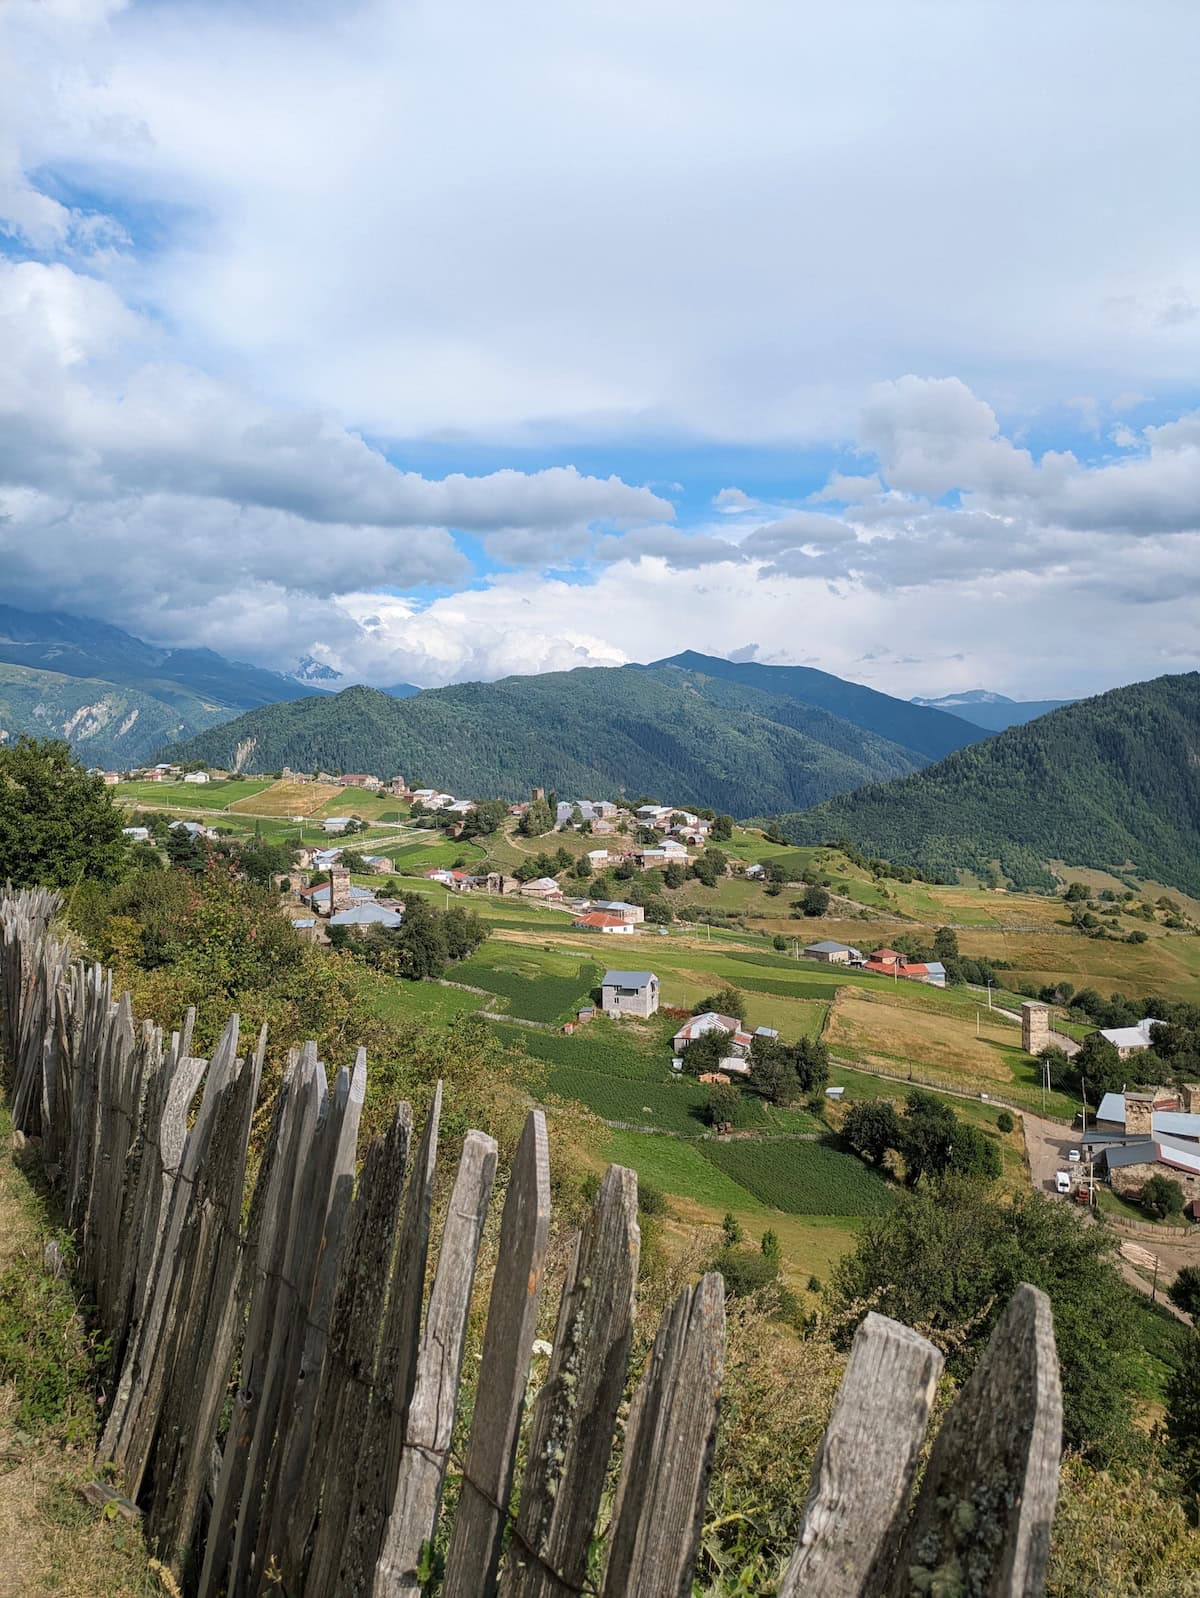
Finally, we descended to Tsvirmi, which was long and rocky. The trail was again confusing as the dried up stream looked like the path sometimes when the actual trail was parallel to it.
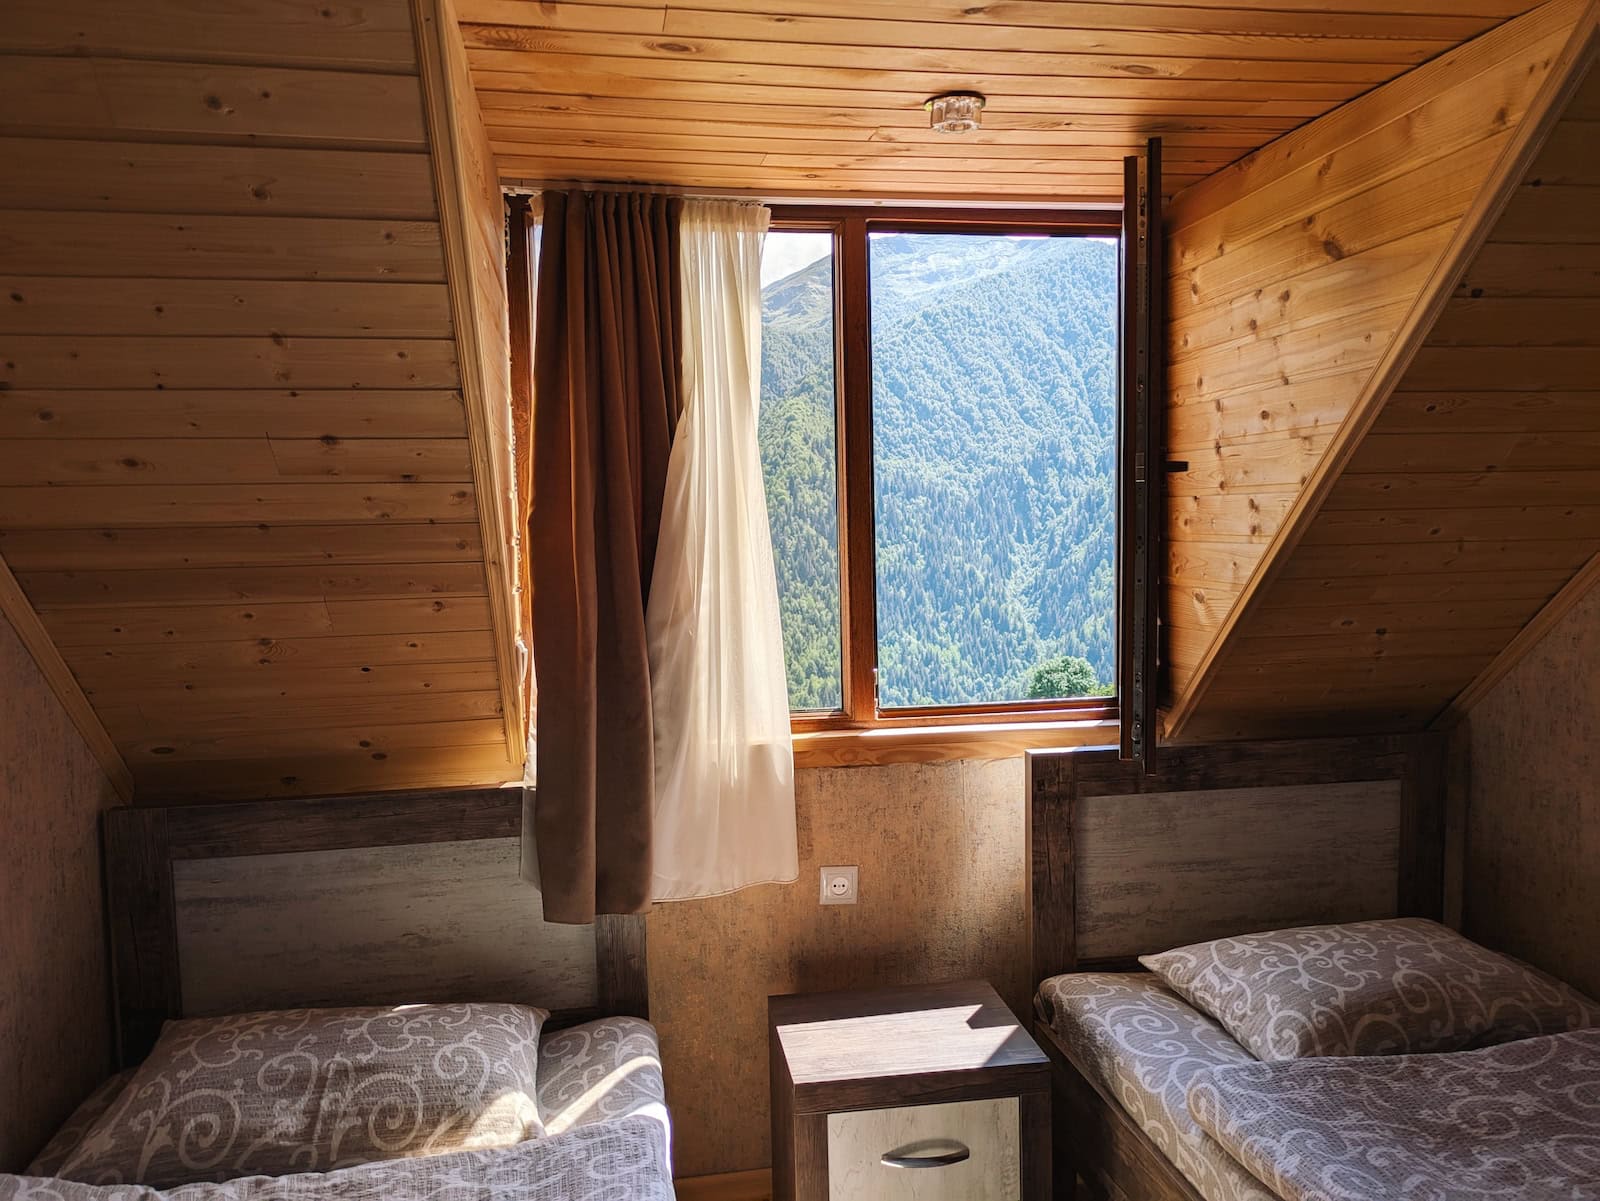
The village was quiet and bucolic, with pigs grazing and chickens wandering around. We asked around and found Shorena’s Homestay. Shorena didn’t speak English (only Georgian and Russian), but we communicated fine with Google translate.
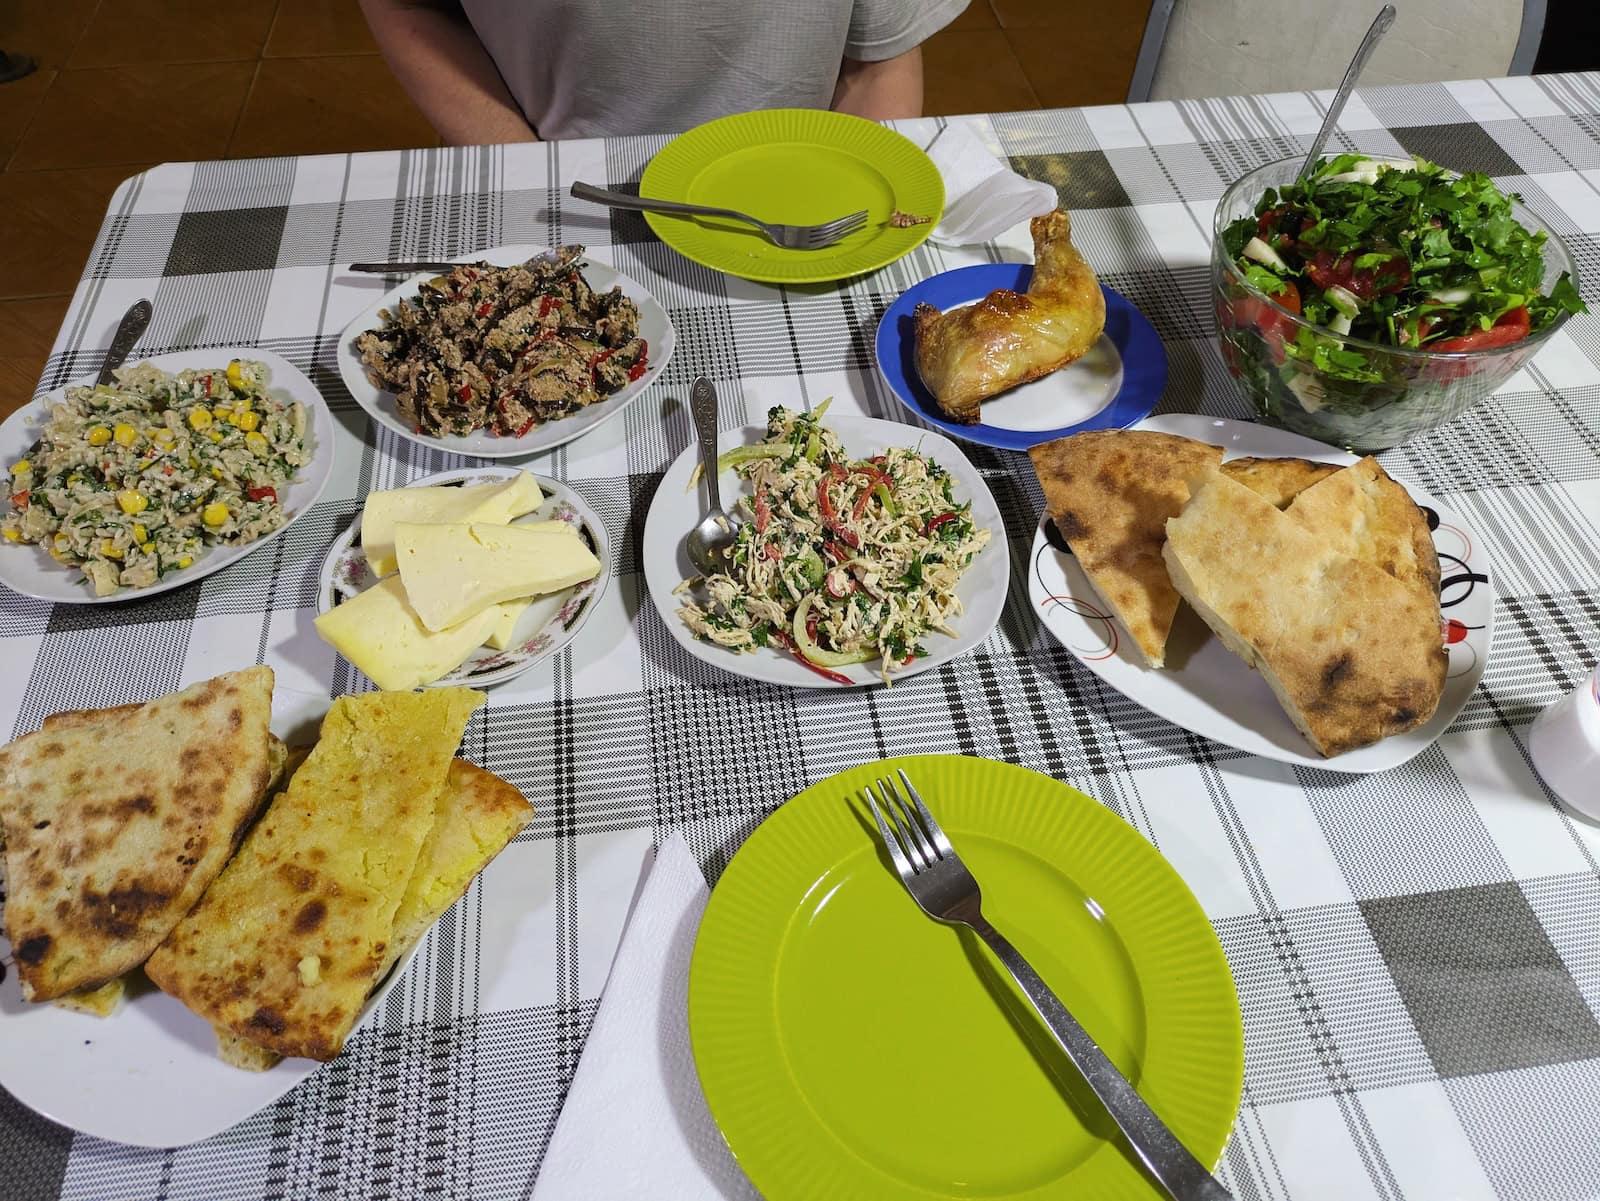
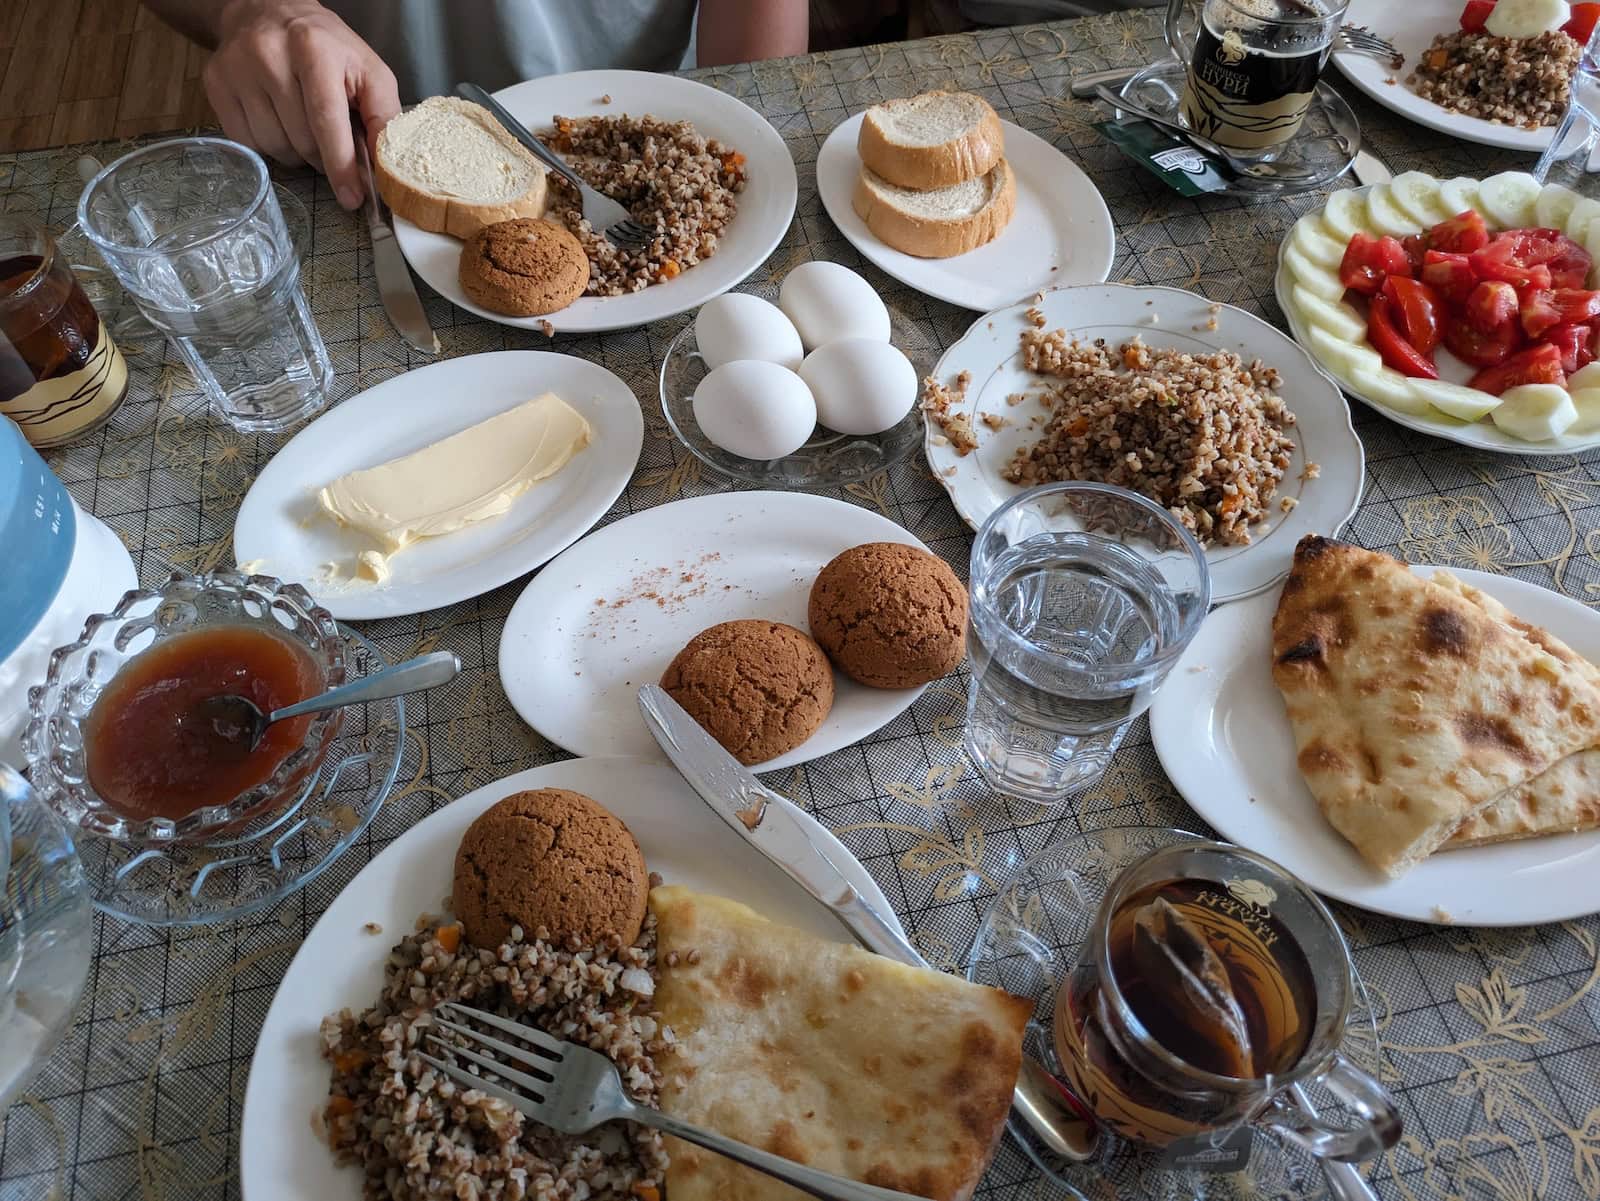
Her home had hot showers, hammocks in the backyard, a huge but gentle dog, and the most generous portions of food. This was my favorite meal spread of the trek; the two of us were the only guests and we got enough food for four.
There was also wifi that we were able to use, which was helpful since the signal wasn’t very good there, as well as outlets. The room was comfortable and we slept well.
Day 2: Tsvirmi to Adishi
- Stats: 10.6mi/17km, 3110ft/950m gain, 2390ft/730m loss
- Accommodation: Guest House BETQIL. Also try Lento Kaldani Guesthouse
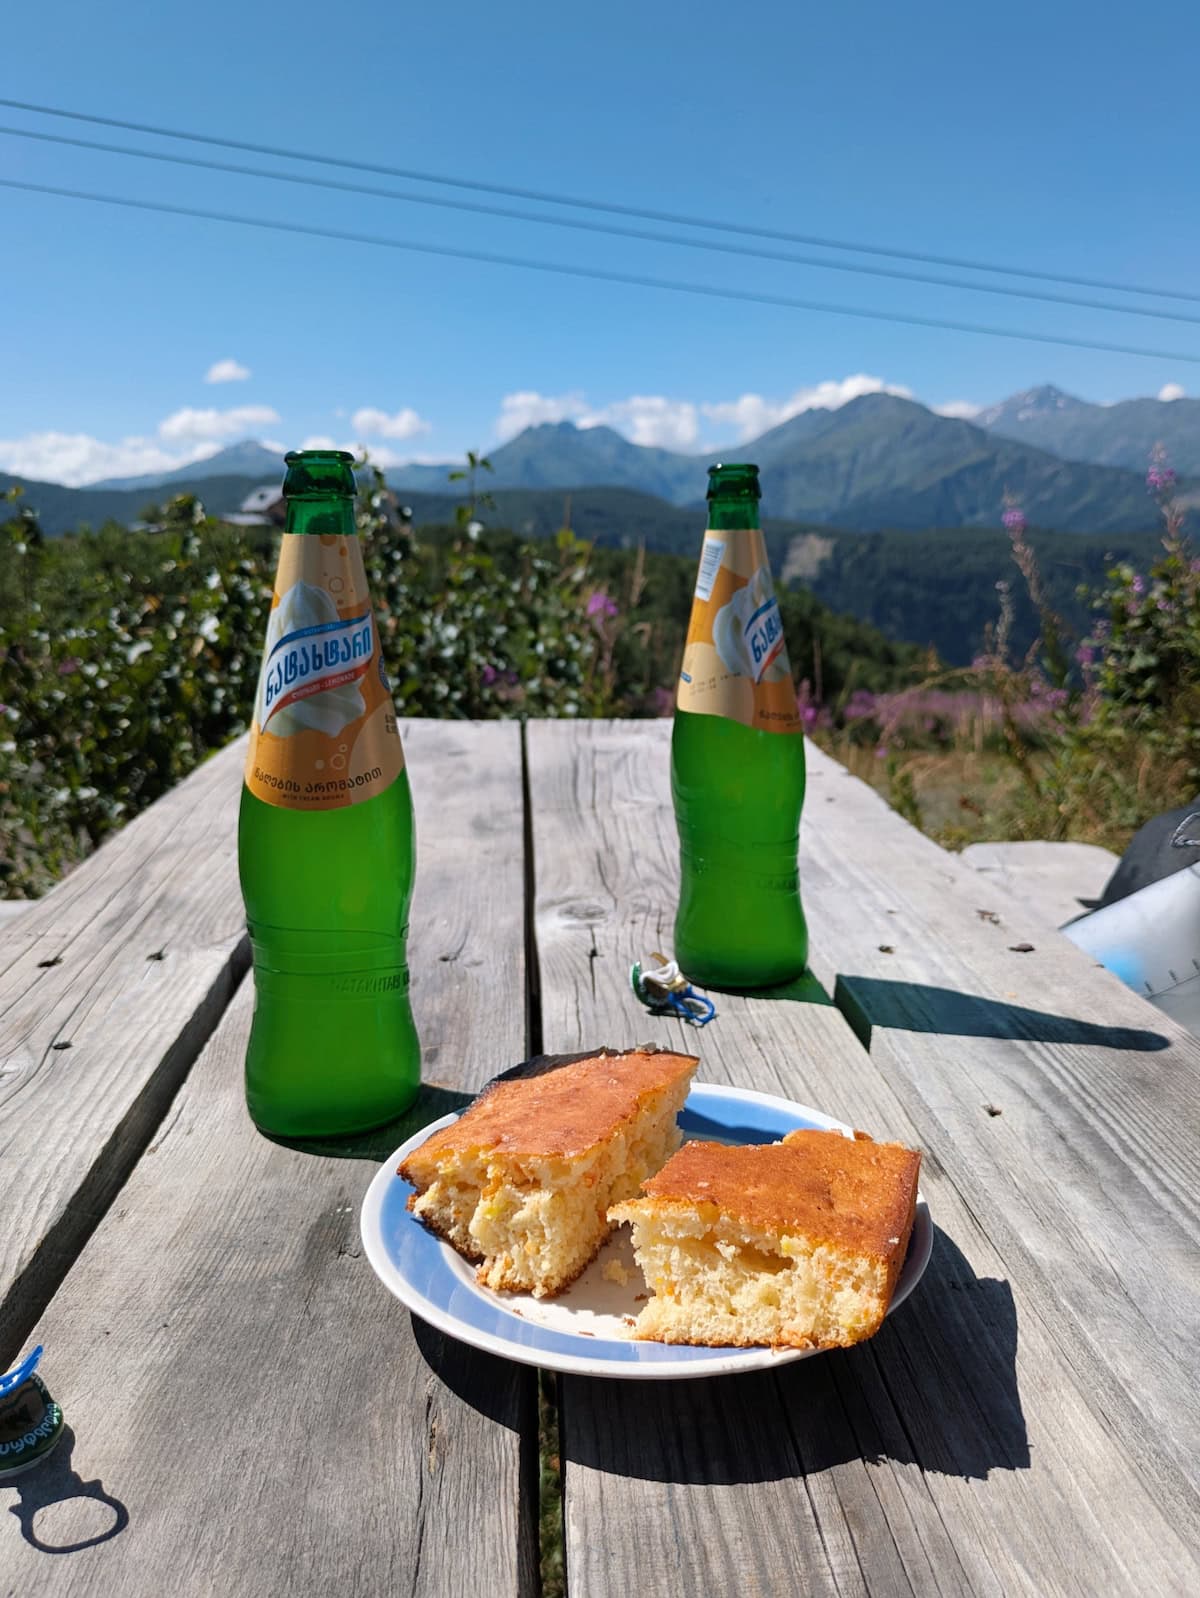
This second day had an easy start along a flatter dirt road. We eventually started climbing and reached another ski resort where we found a small cafe serving snacks. We grabbed a couple slices of homemade cake and more Georgian lemonade.
From there, we climbed more and found the sign to Adishi pointing a different way than my navigation devices were taking us. If you want to have an easier day, follow the sign right and skip the climb.
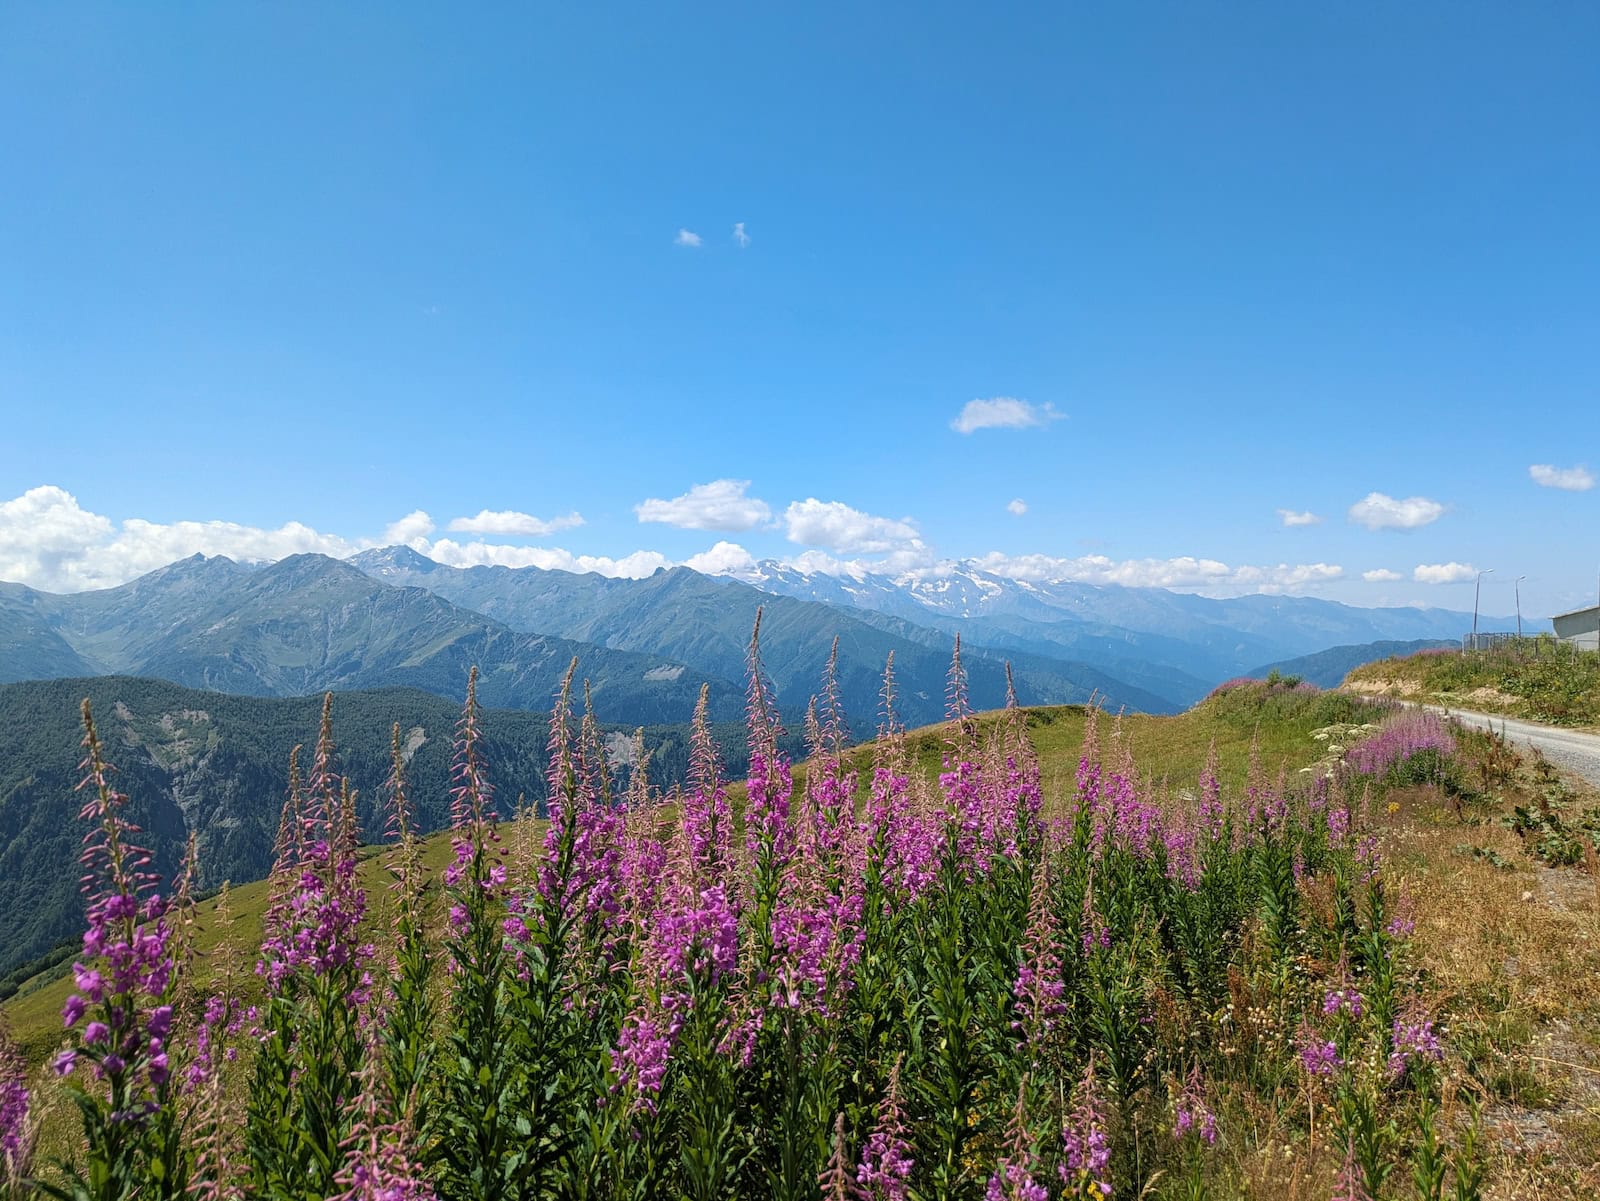
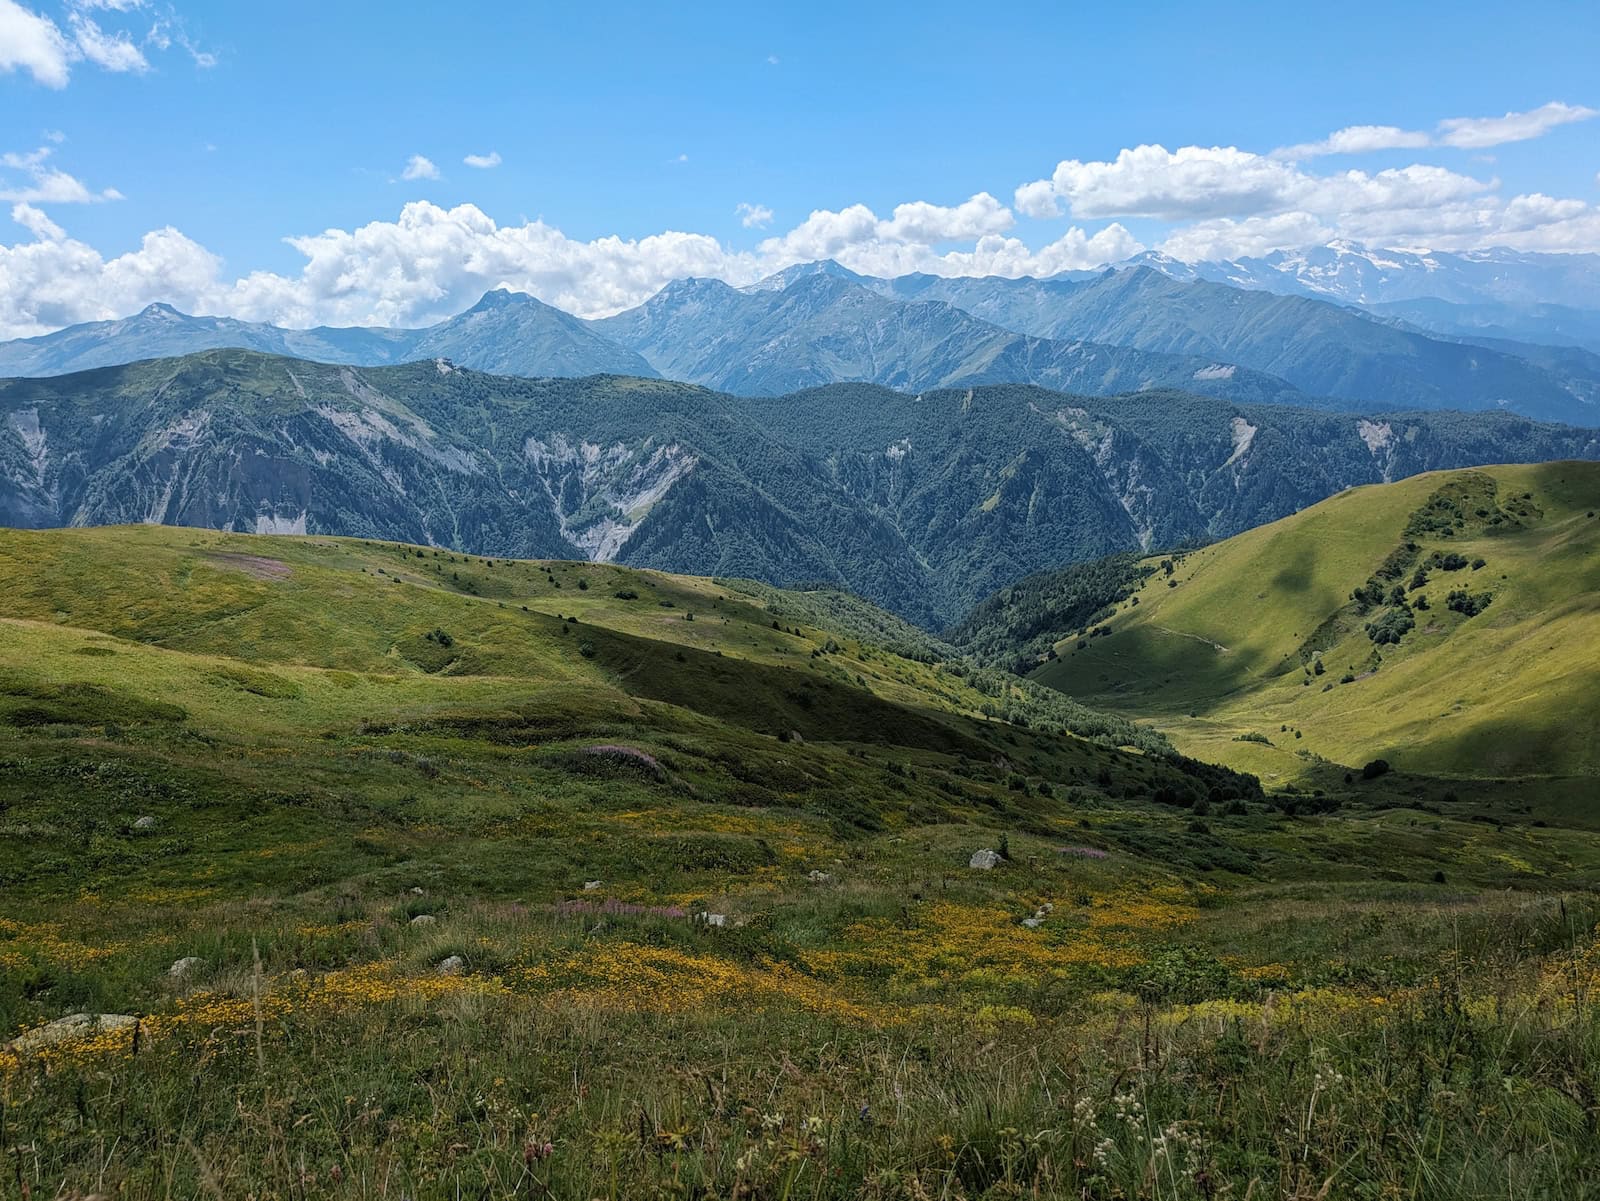
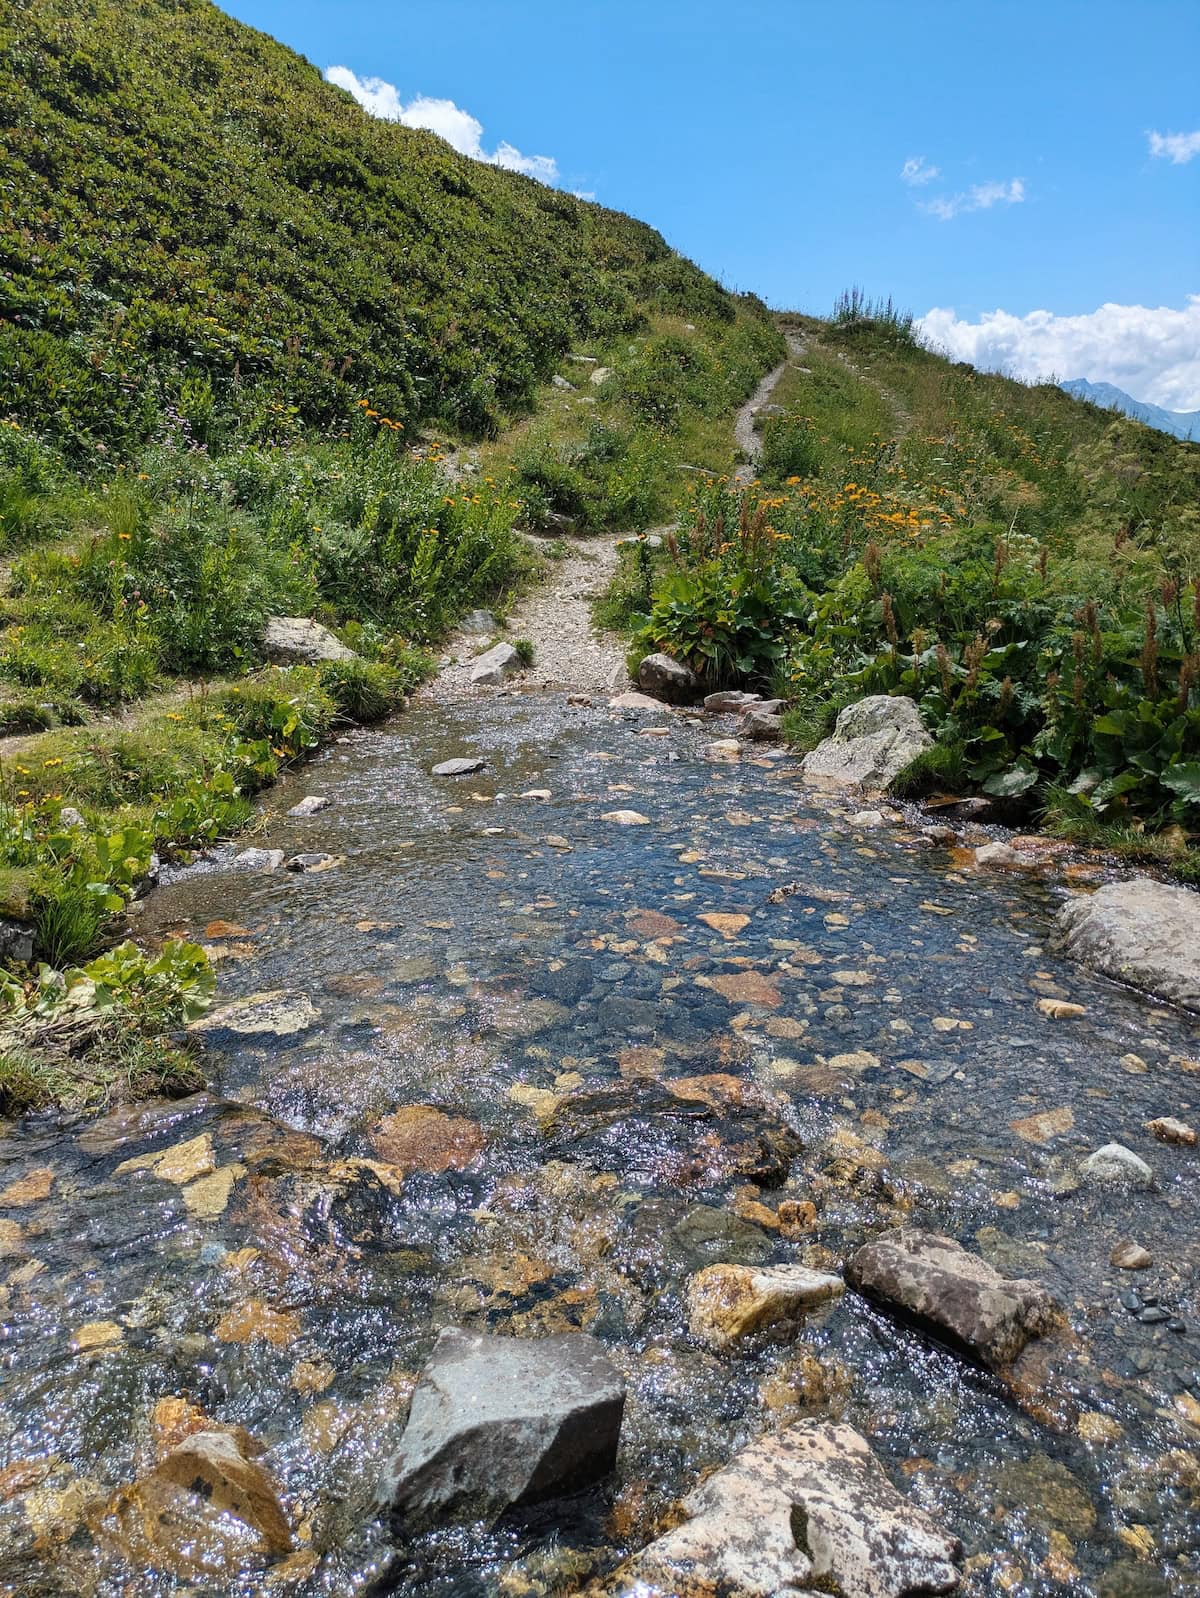
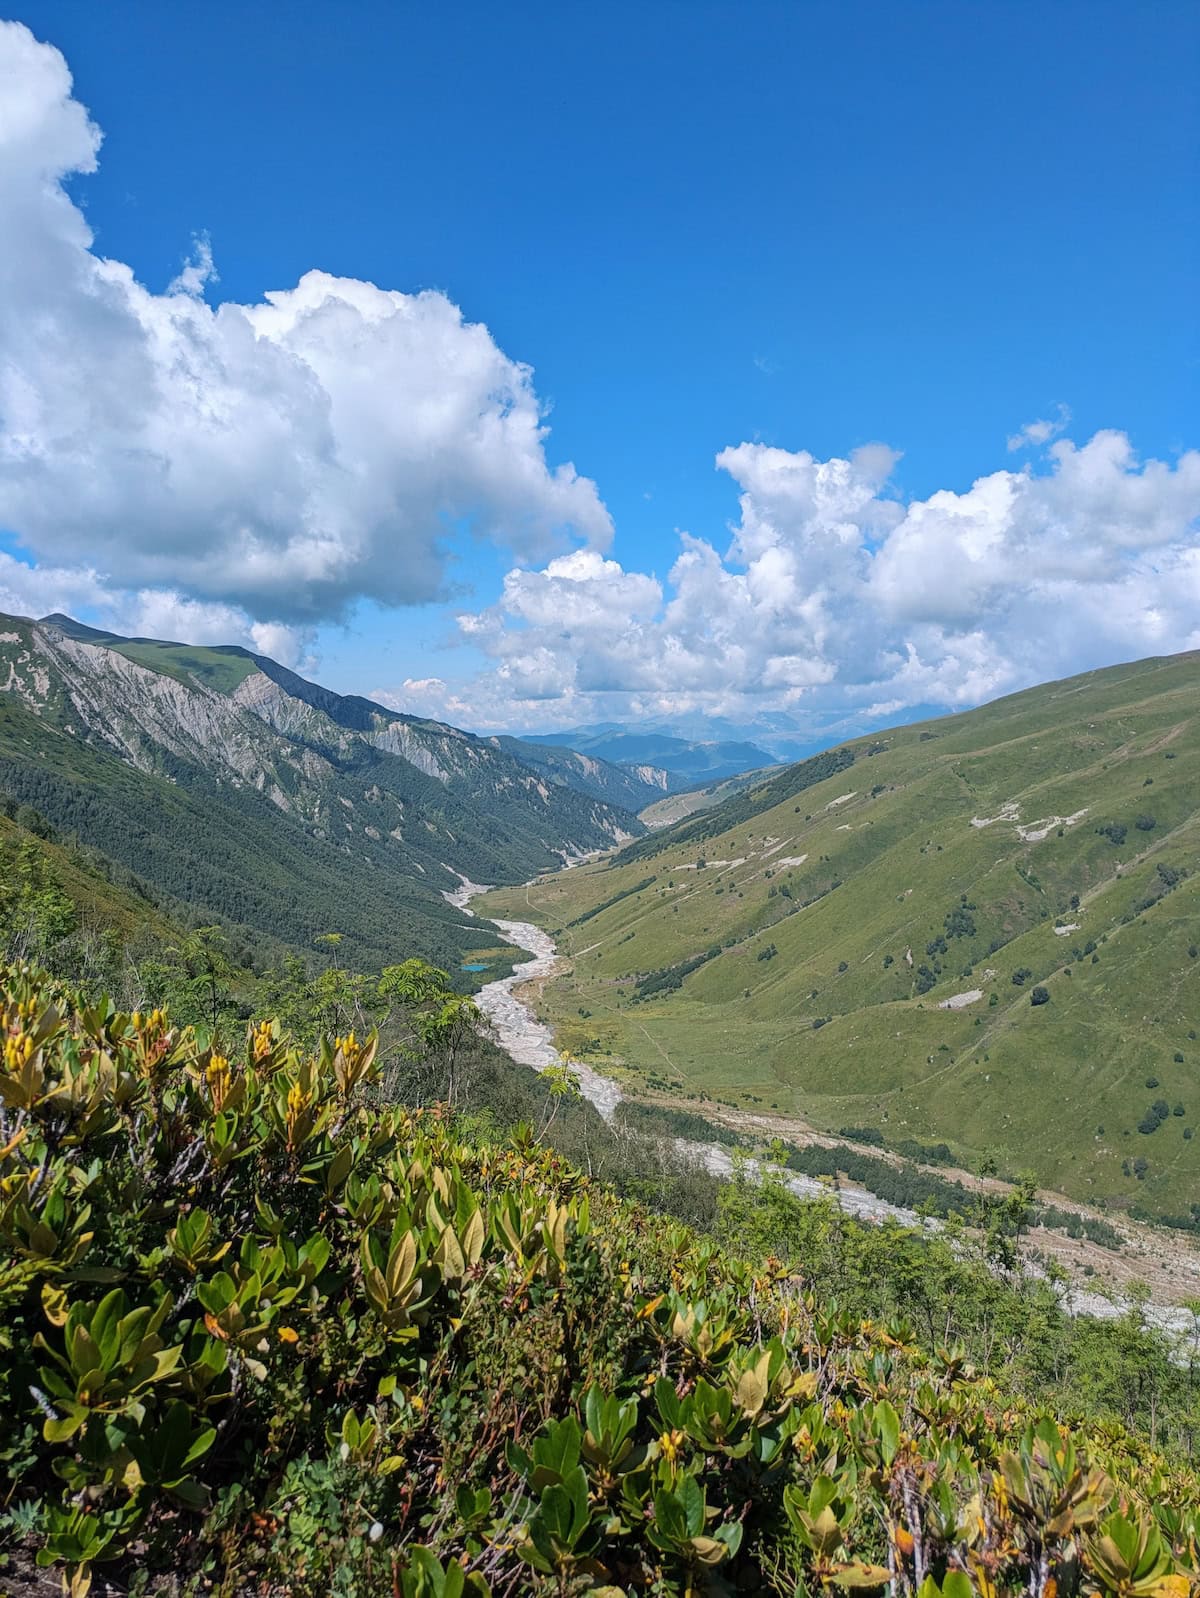
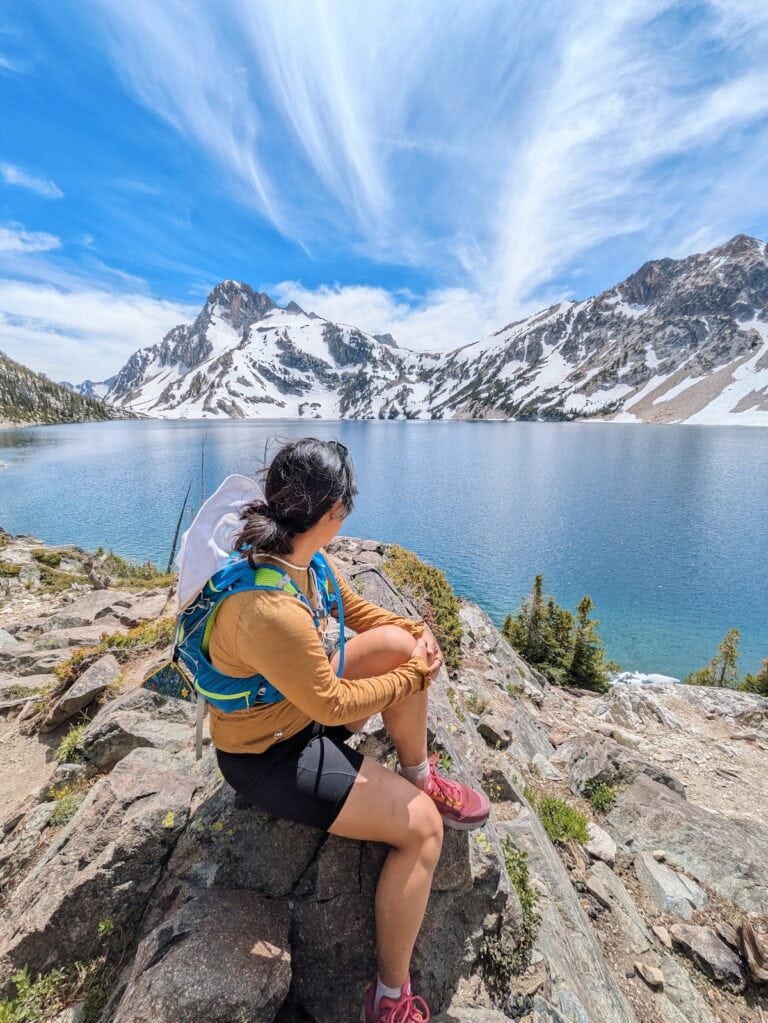
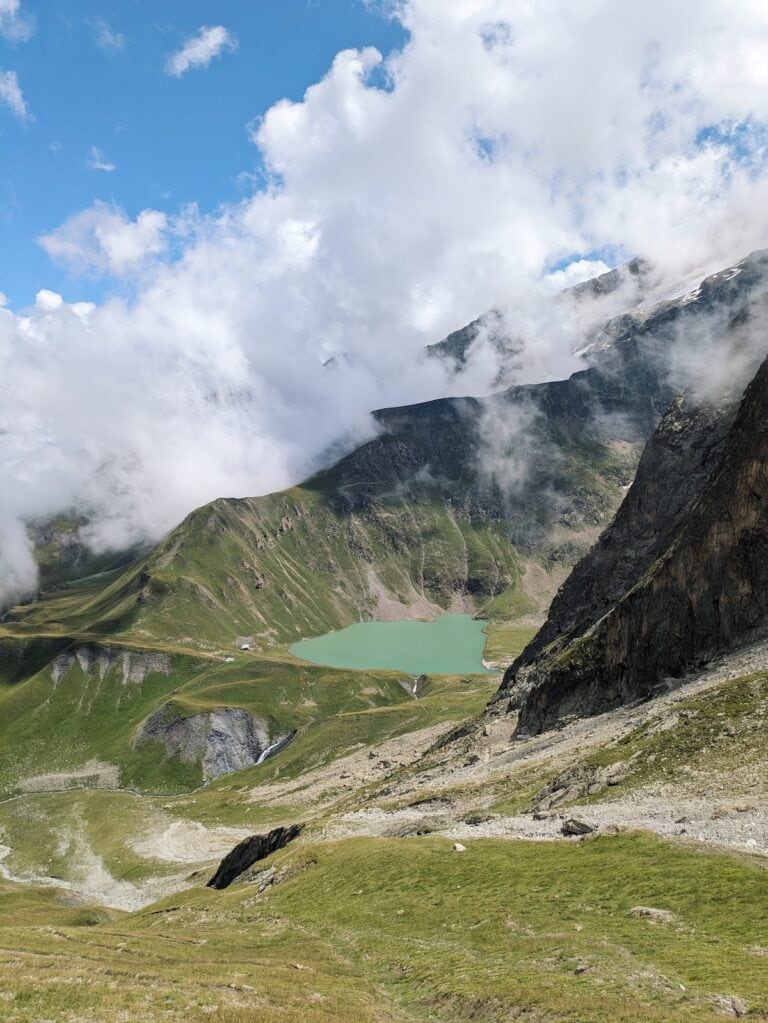
We took the left path up, which was challenging but worth it. The trail eventually leveled out and we found ourselves in magical mountain fields full of swaying flowers, bubbling streams, tadpoles, and colorful moths. We had the mountains all to ourselves since everyone else had gone the other way.
The descent was rough, though. Since we’d gone up, we had so much more elevation loss to get to Adishi. The trail was steep and I worried about tripping and falling towards the end. My legs and feet were burning from the strain.
On top of that, the mental challenge was not being able to see the village from afar. Adishi was at the bottom of the mountain and hidden from view by the trees and sharp angle of the slope.
The previous day, we’d been able to spot the village from afar and new how close we were getting. This day, however, we didn’t see the village until we’d completed the sharp descent.
It was a bit tricky to find the entrance to Guest House BETQIL. We ended up hopping a fence since all the signs pointed us that way.
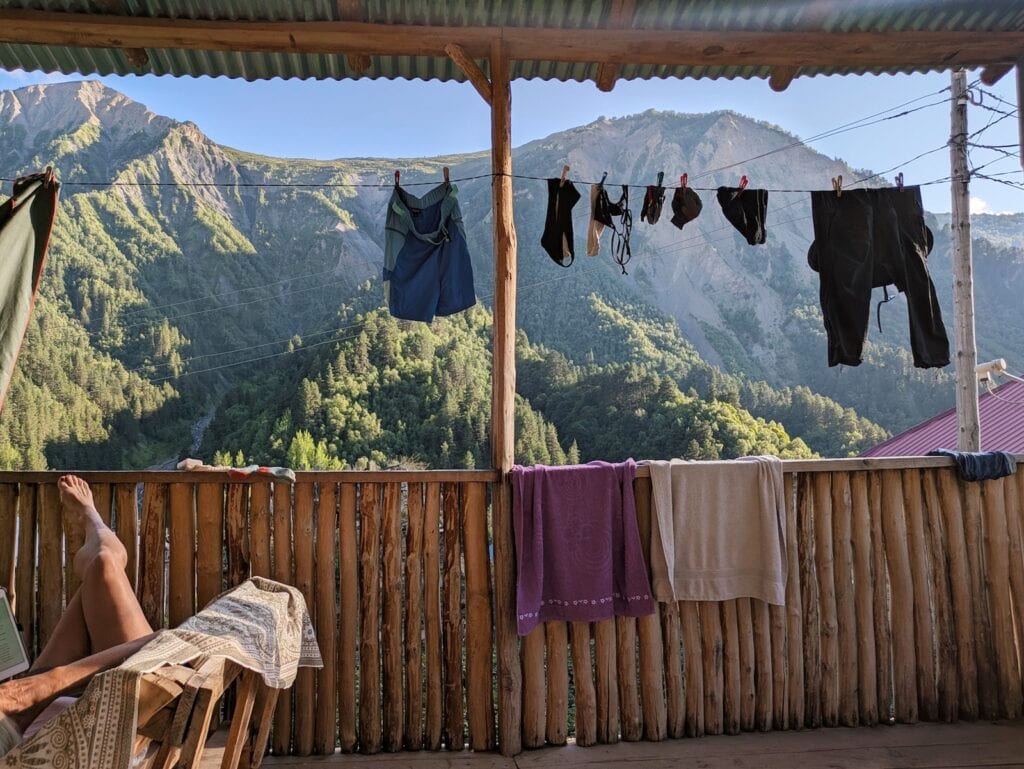
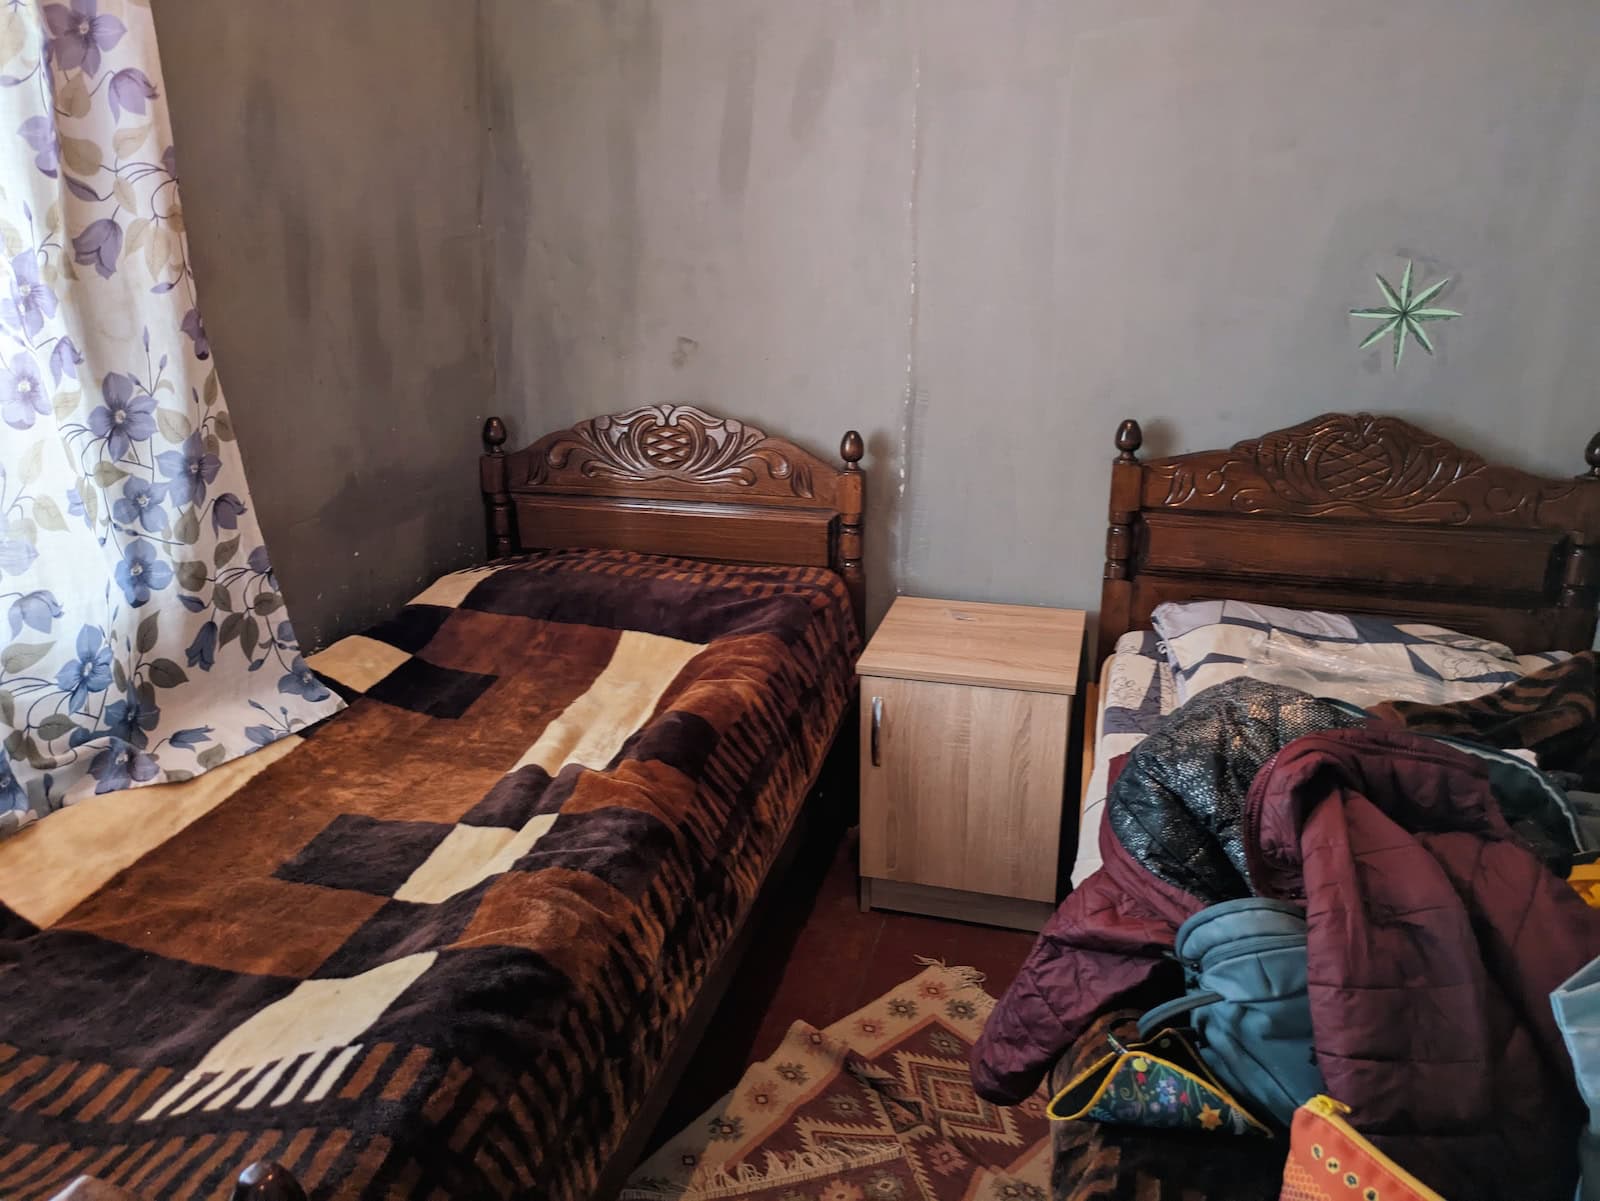
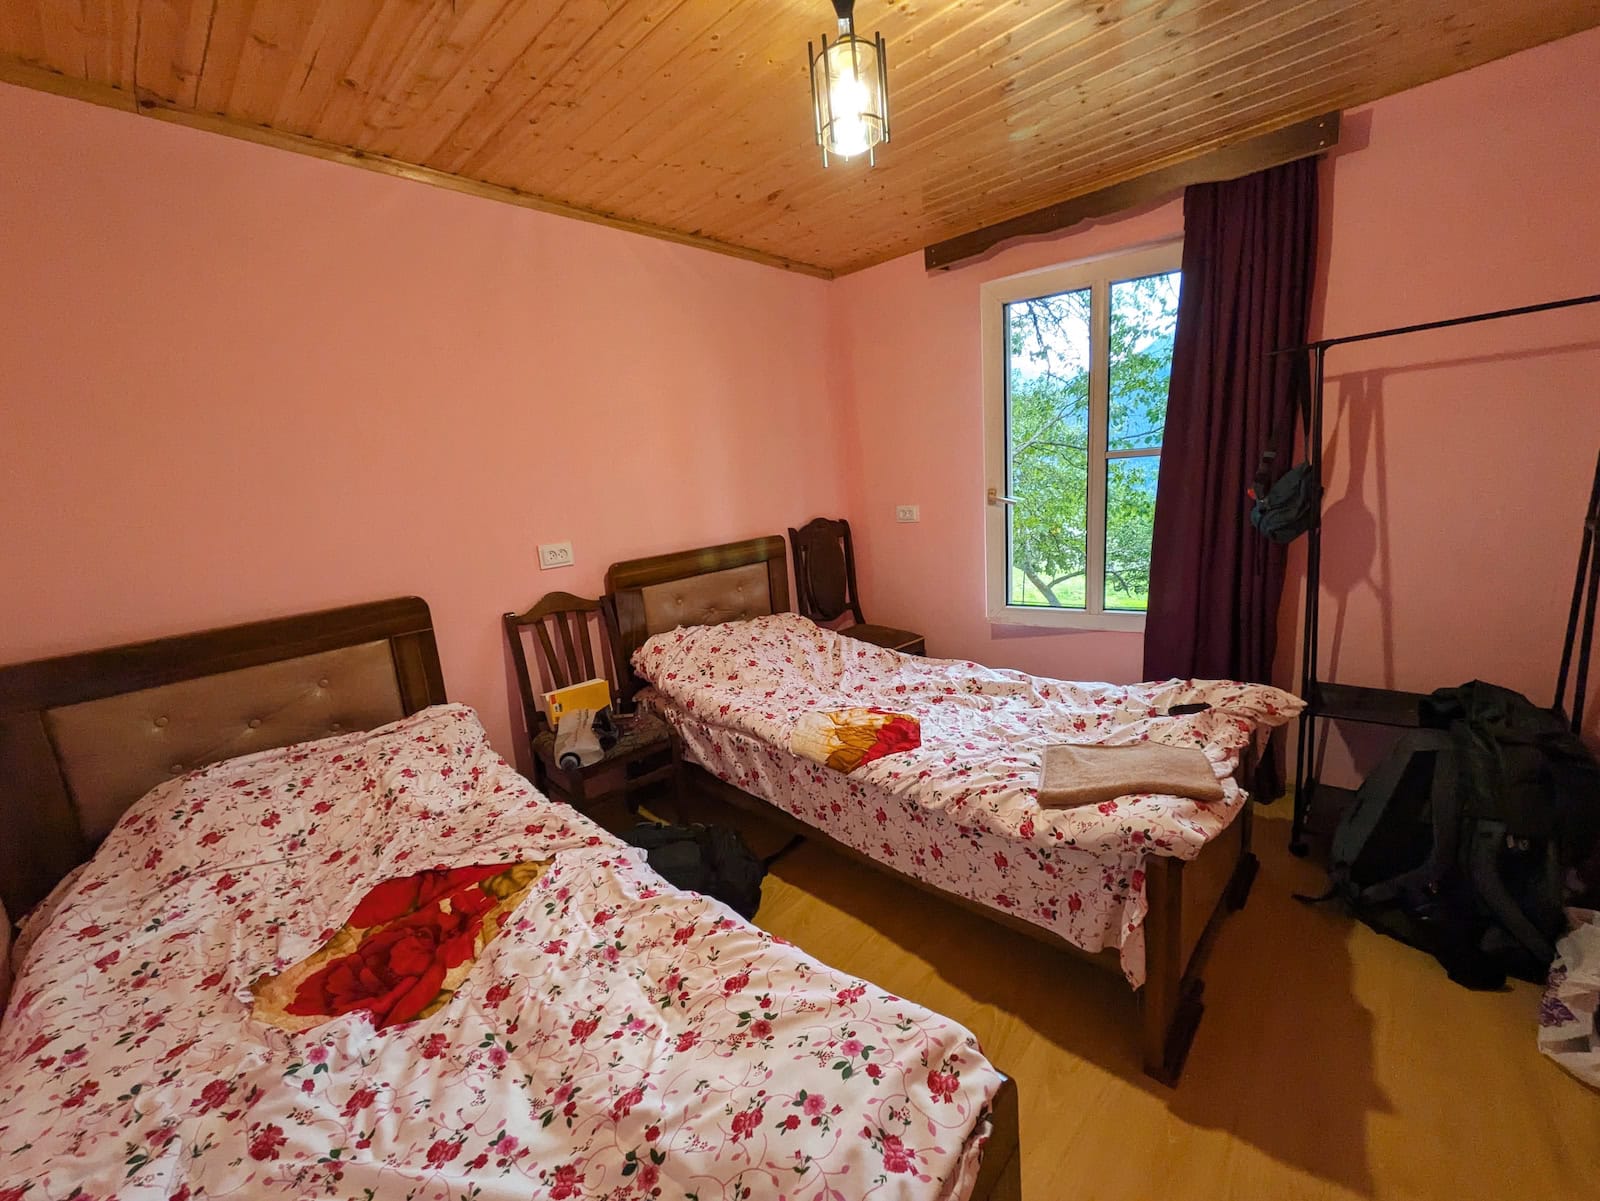
This was the most rustic stay of the three nights. It was basically glamping since the housing was like a cabin that wasn’t truly “inside”. The wooden walls and doors weren’t very well-insulated and had openings to the outside. It was communal and peaceful though; I loved the open air porch with couches and laundry lines. There was also wifi that was ok, outlets, and hot showers.
Our room was dark and a bit chilly but we slept well. I went outside in the middle of the night and saw beautiful constellations from the porch.
Day 3: Adishi to Iprali
- Stats: 11mi/17.7km, 2380ft/725m gain, 2830ft/860m loss
- Accommodation: Guest House Betegi
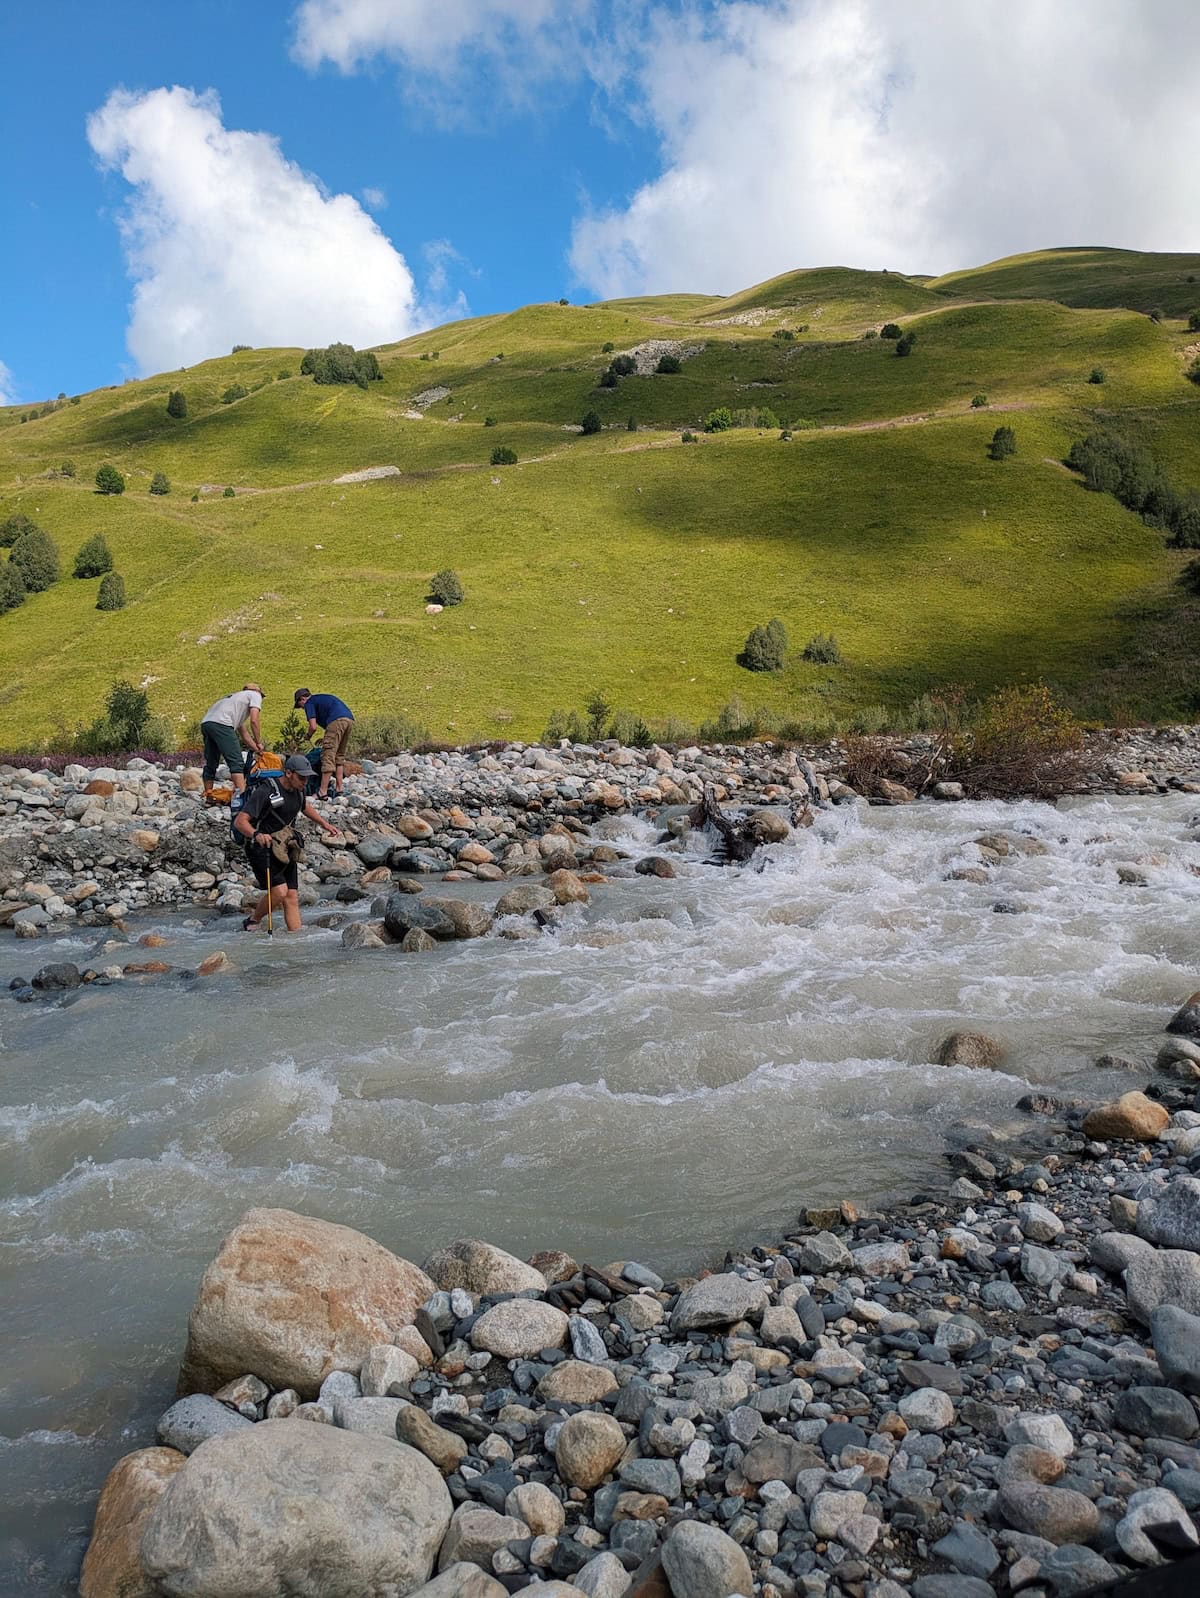
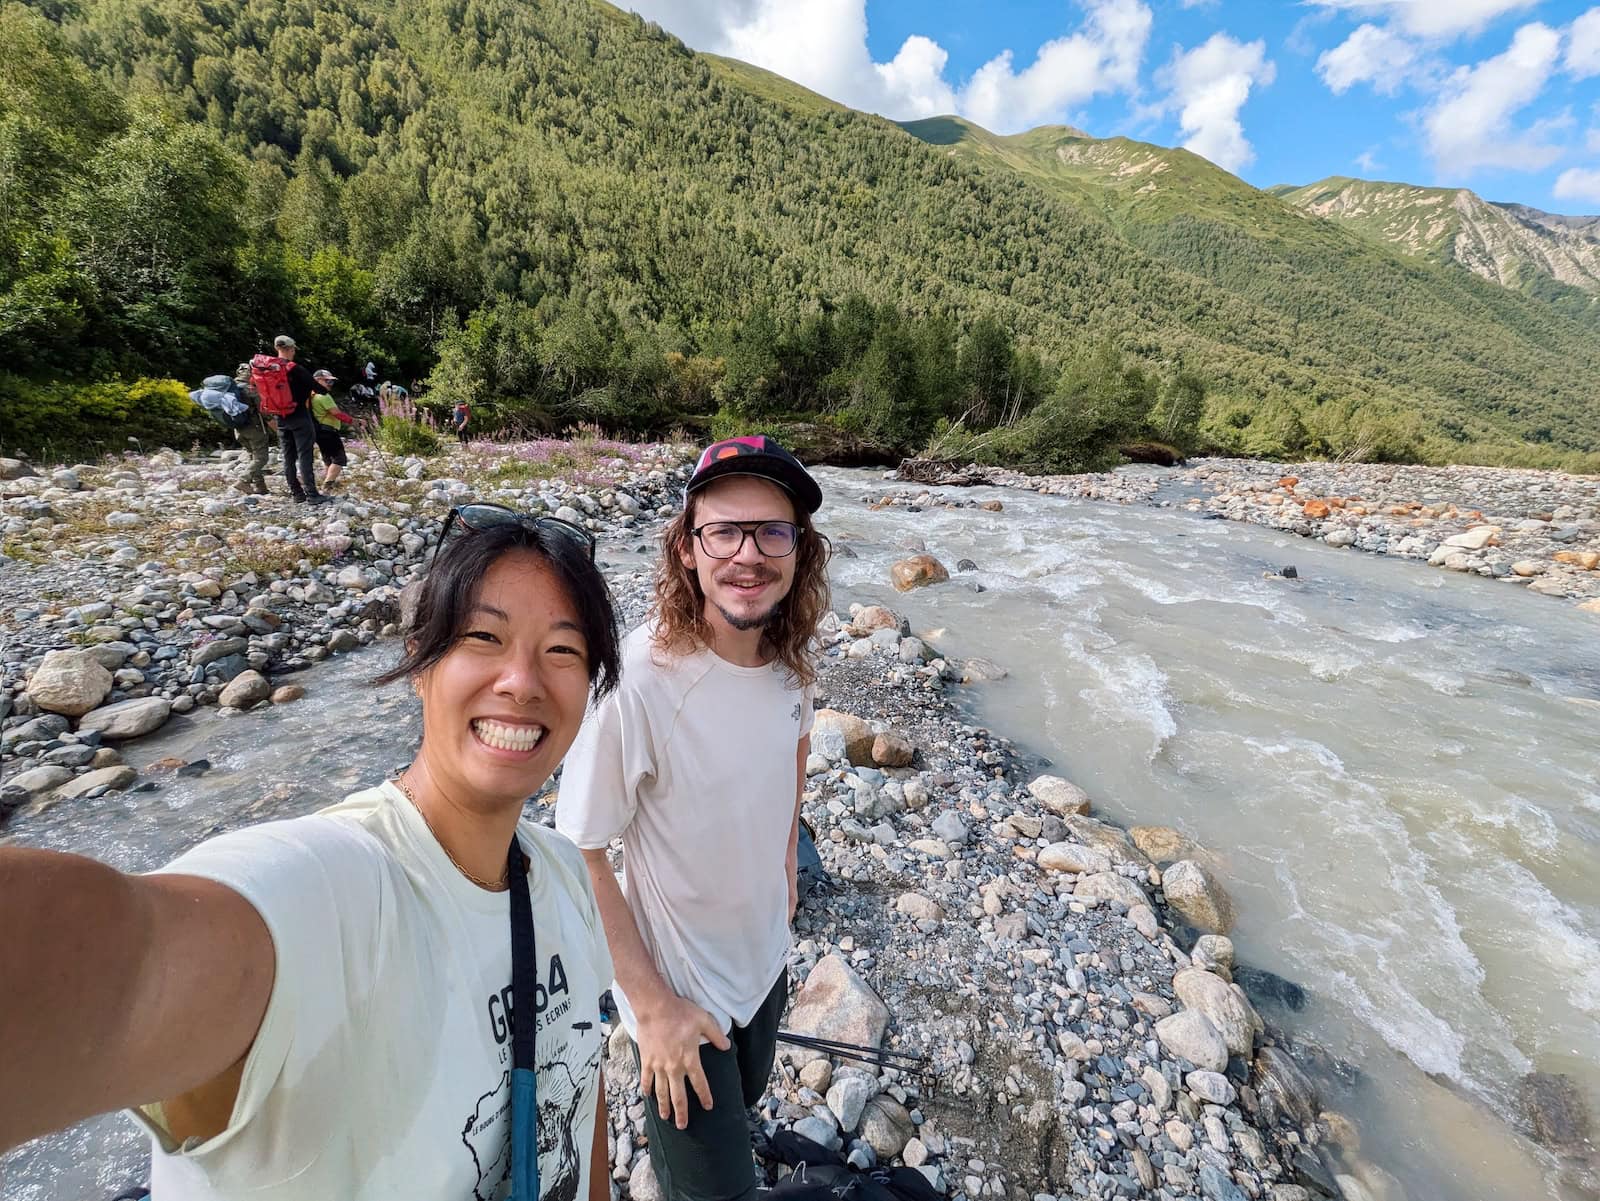
This was the infamous river crossing day. It’s known for being the hardest day of the trek, but since we did the route via Tsvirmi, we didn’t consider it any more difficult than the other days. In fact, it was easier than the first two in terms of elevation gain.
We left the village and enjoyed a flat section along the river until we reached the crossing point. Just be sure to watch out for horses as several men from the village charge for horse rides across the river, and they gallop quickly to work in the morning.
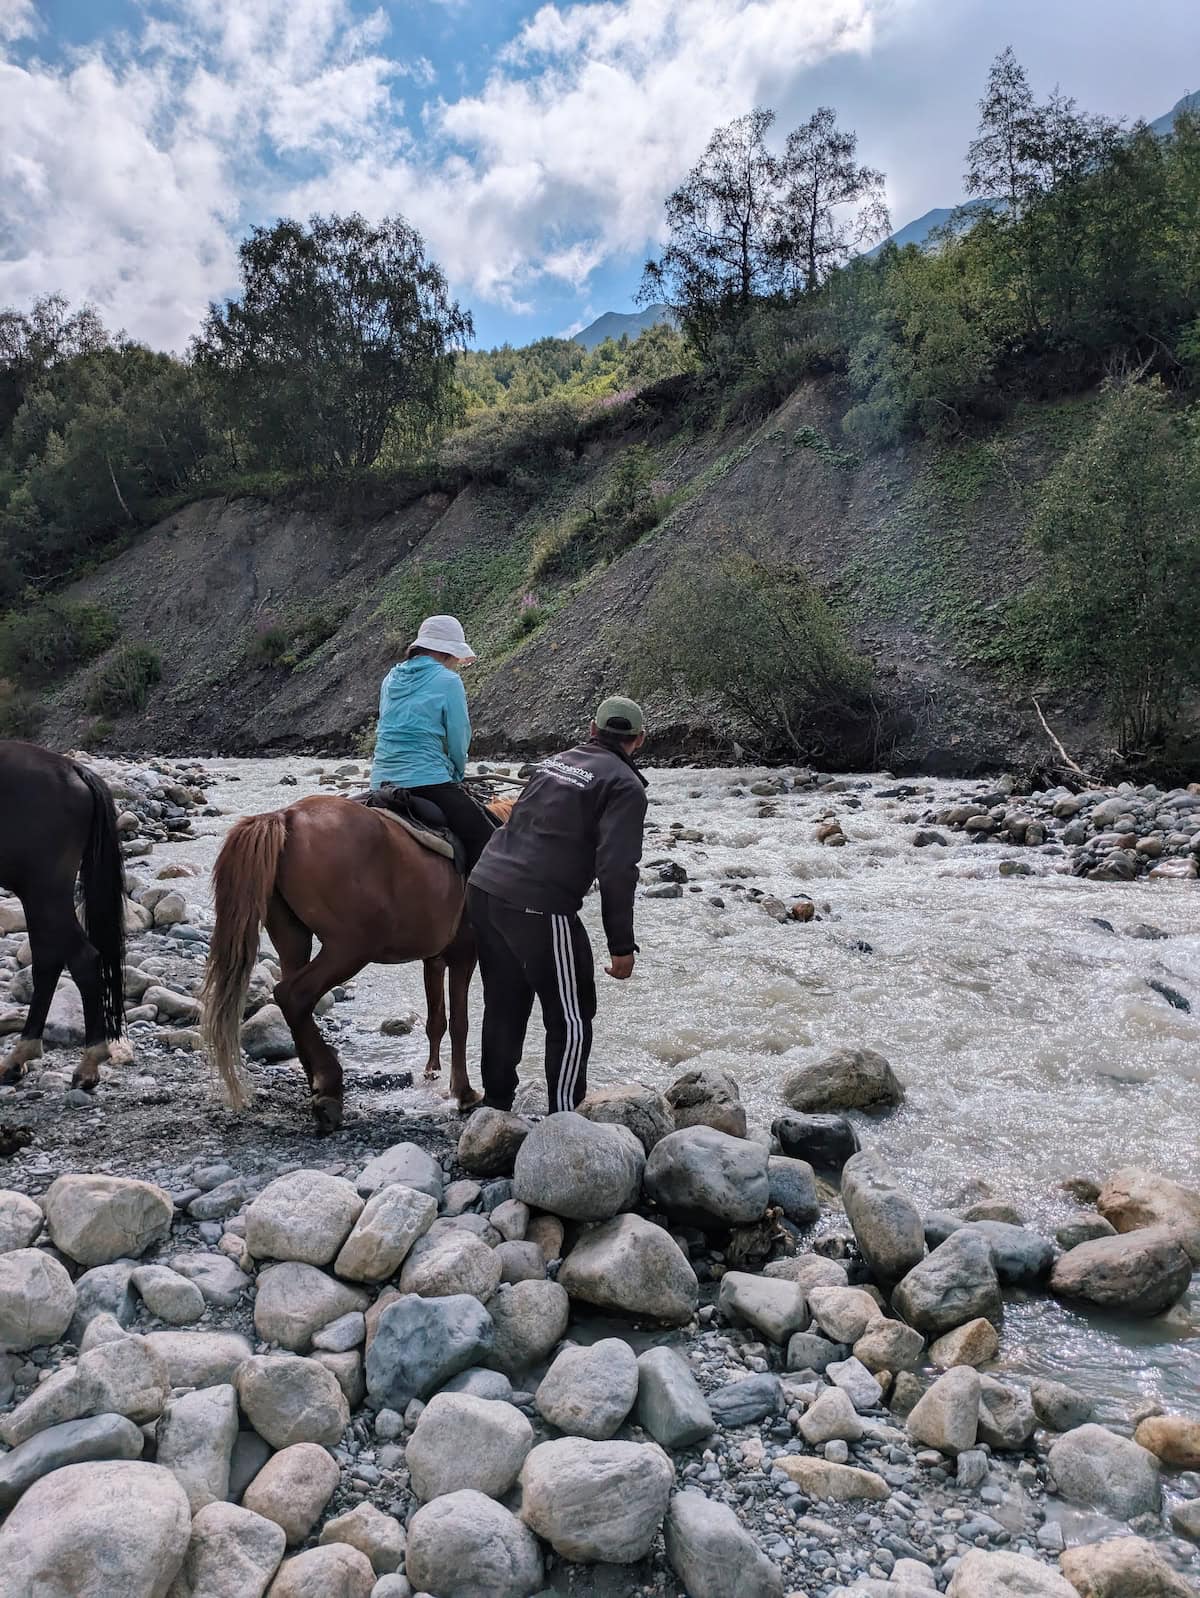
It costs around 25 lari per person (~$10) to cross the river on a horse, but it’s a 20-second ride. There is also a second, much smaller crossing and you’re on your own there—the horse only takes you across the first.
My friend and I decided to attempt this on our own a bit further down the river. The water was freezing to the point it hurt. Porter went first and helped me over since the current was so strong and went past my knees. I was shaken after almost falling and being swept away, so we rested a bit before the second crossing, which was more of a splash that would get your boots wet. I recommend keeping your boots off until you cross both sections.
I also would not recommend attempting the river crossing by yourself unless it’s very low. It can be pretty dangerous, so prioritize your safety!
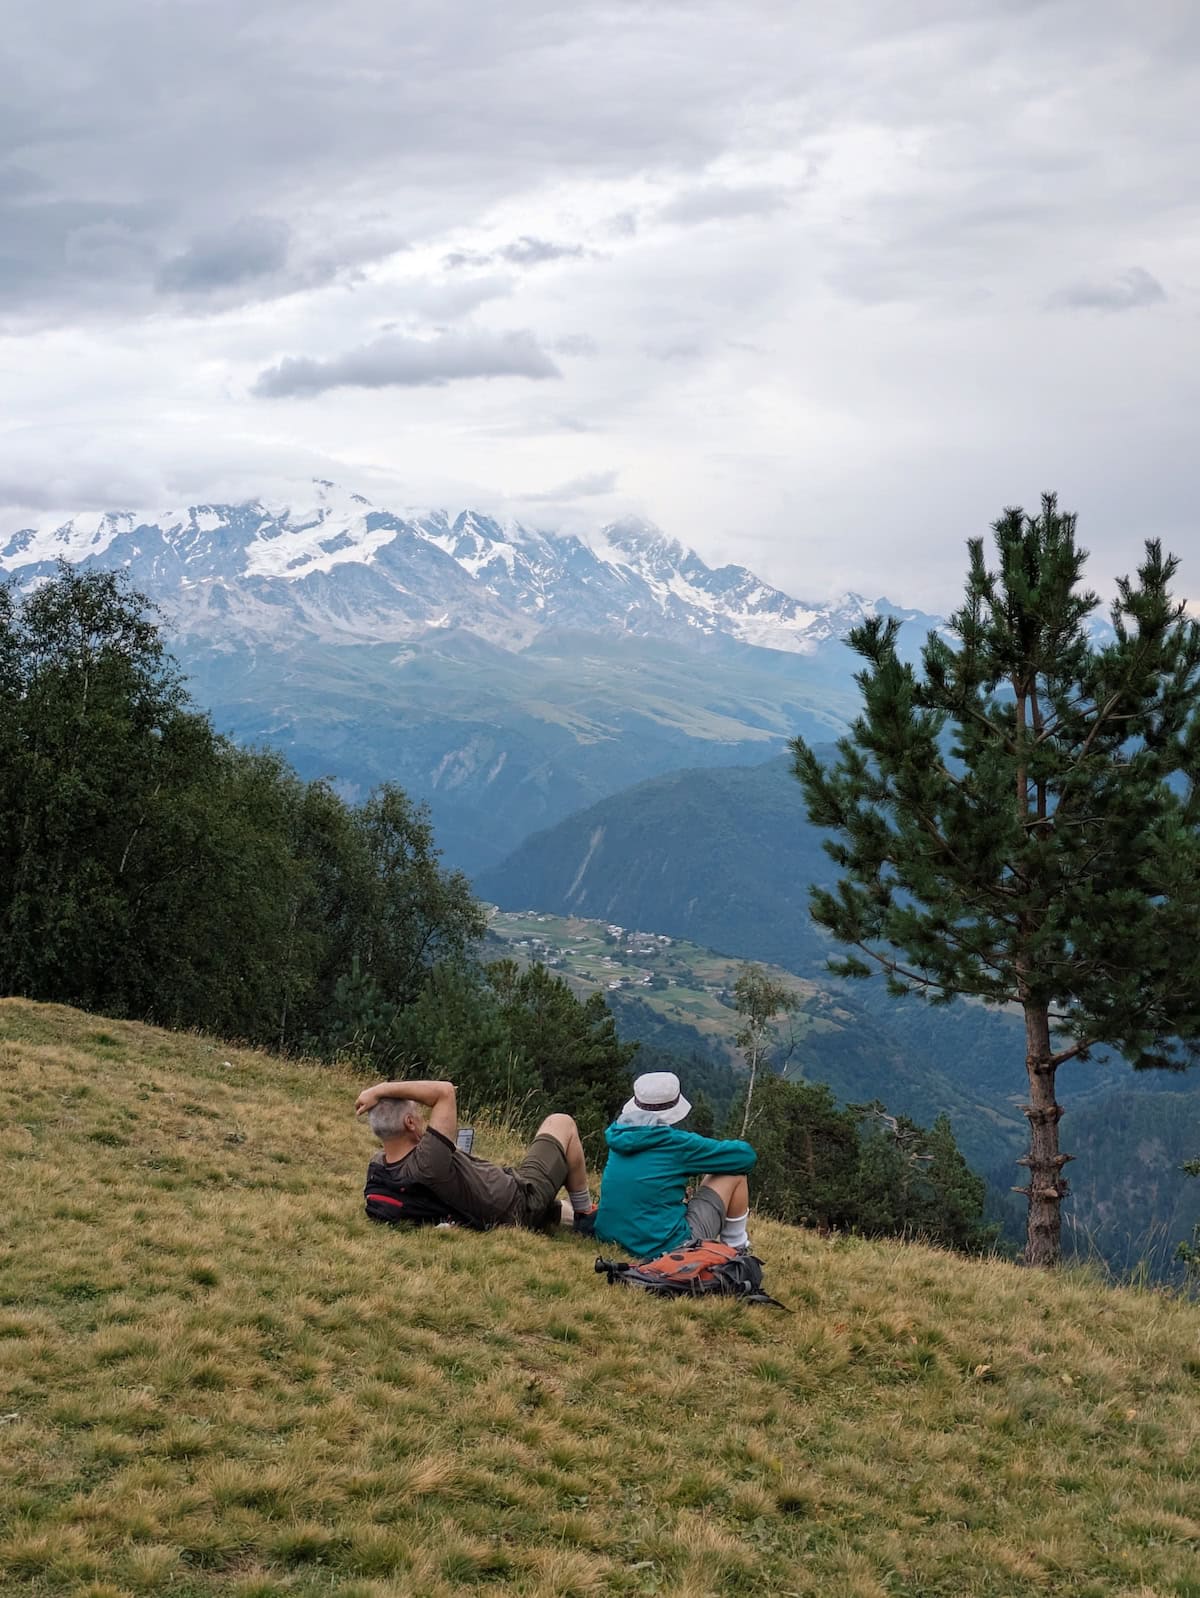
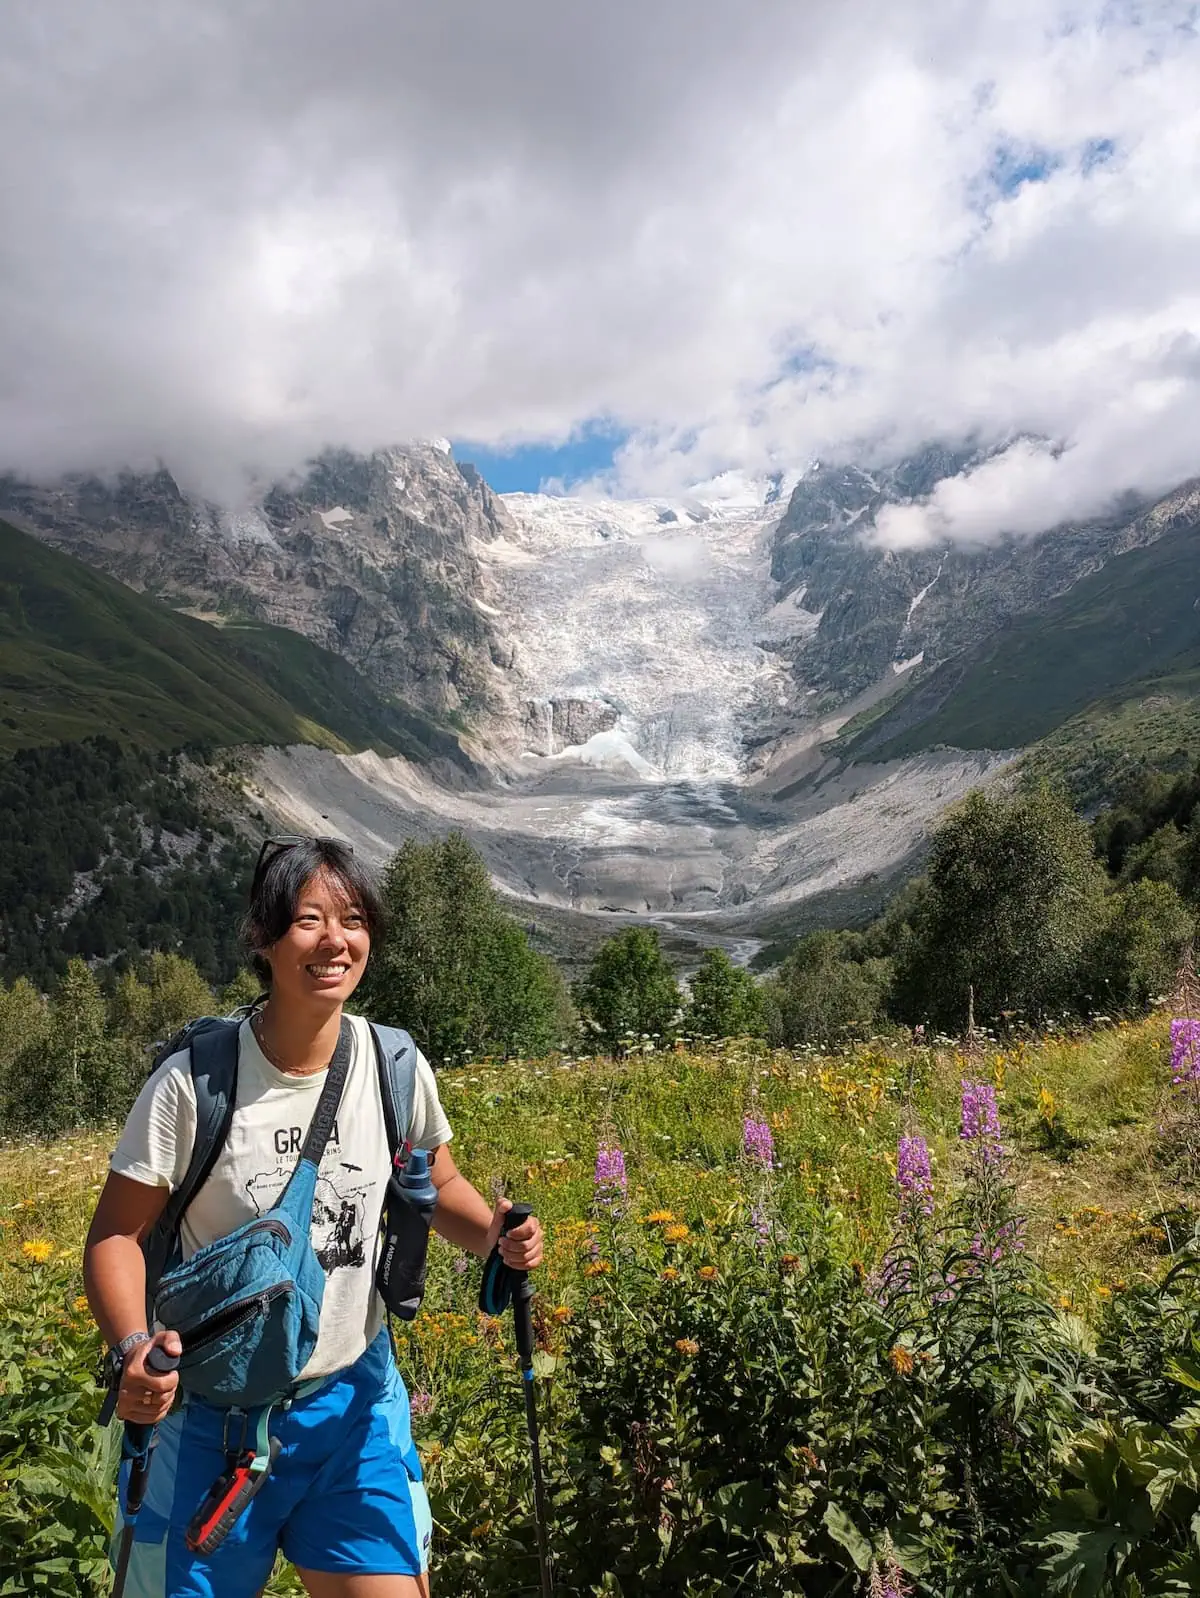
From there, it was a long and steep climb, but with beautiful views of Adishi Glacier. There were several photo ops. The view from the peak was underwhelming compared to the earlier views we’d had, but it was a sunny spot to eat lunch.
From there, it was an easier descent and flatter walk to the next villages. We encountered many streams and muddy spots though!
We stopped at the village of Khalde and had our snack break of the day. If the guest houses in Iprali are fully booked, this is an alternate place to stay.
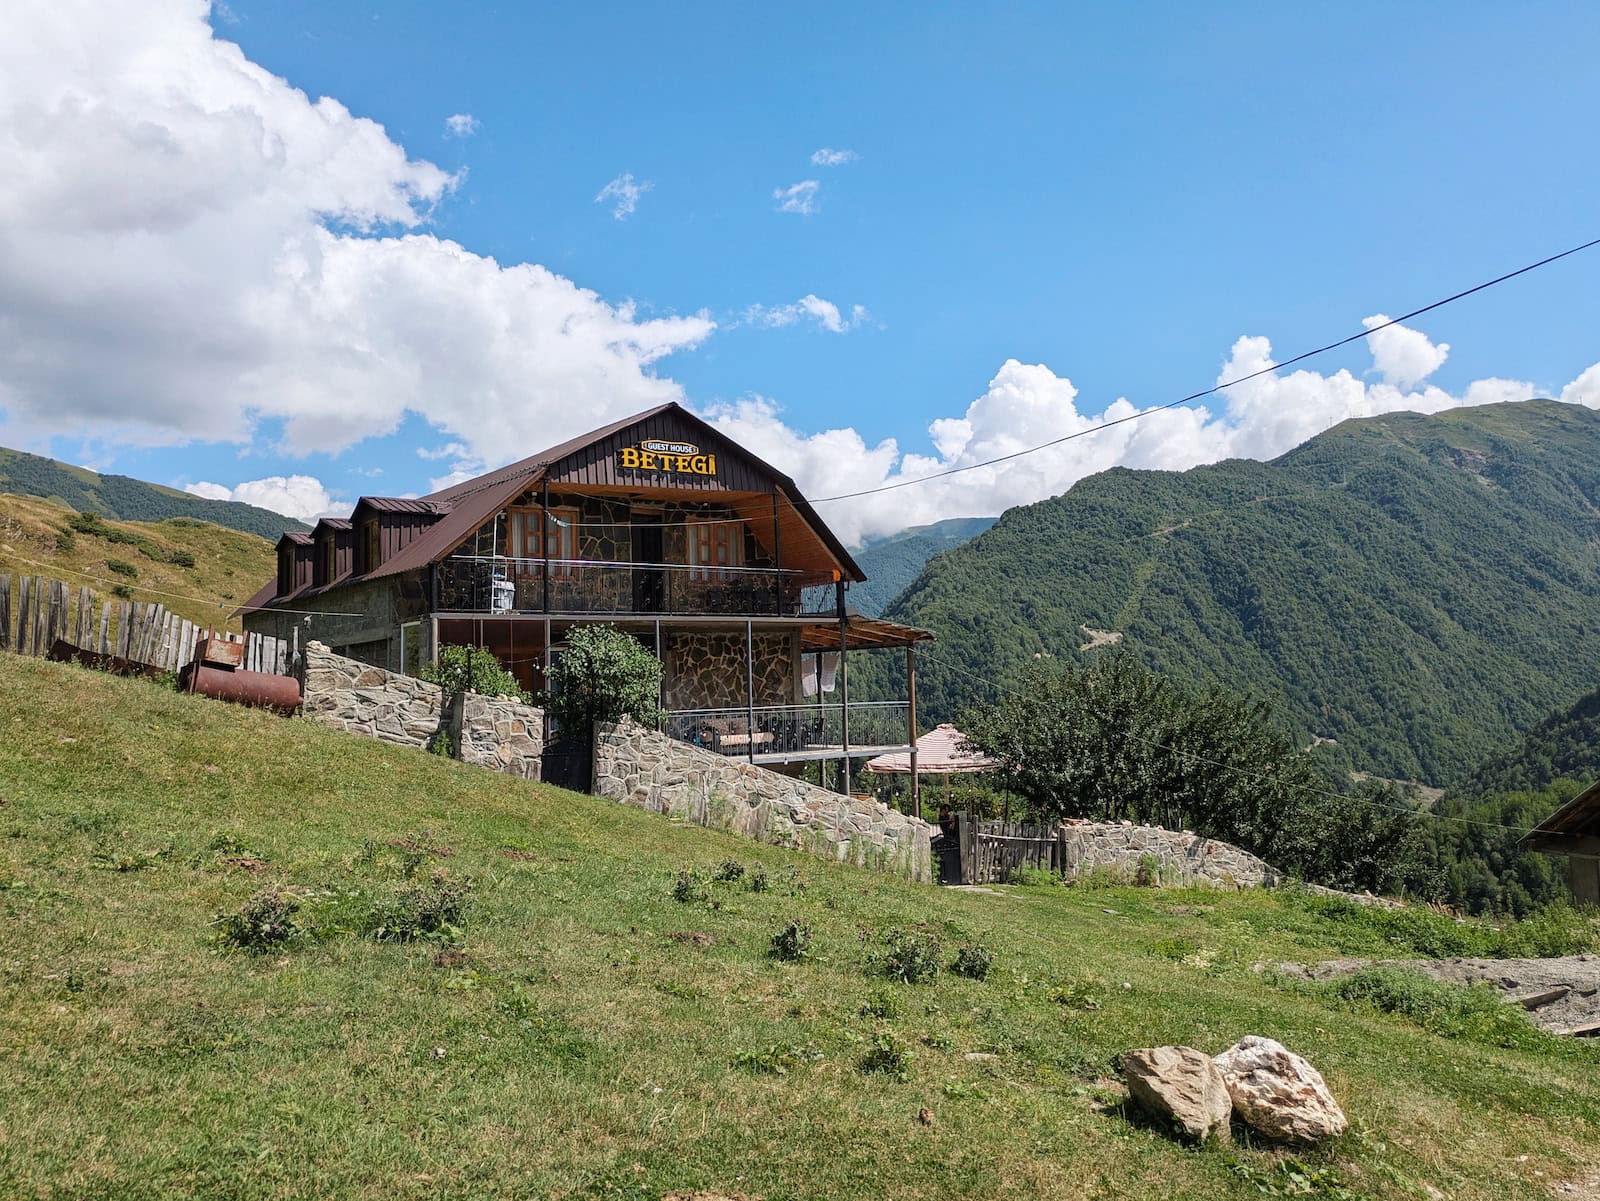
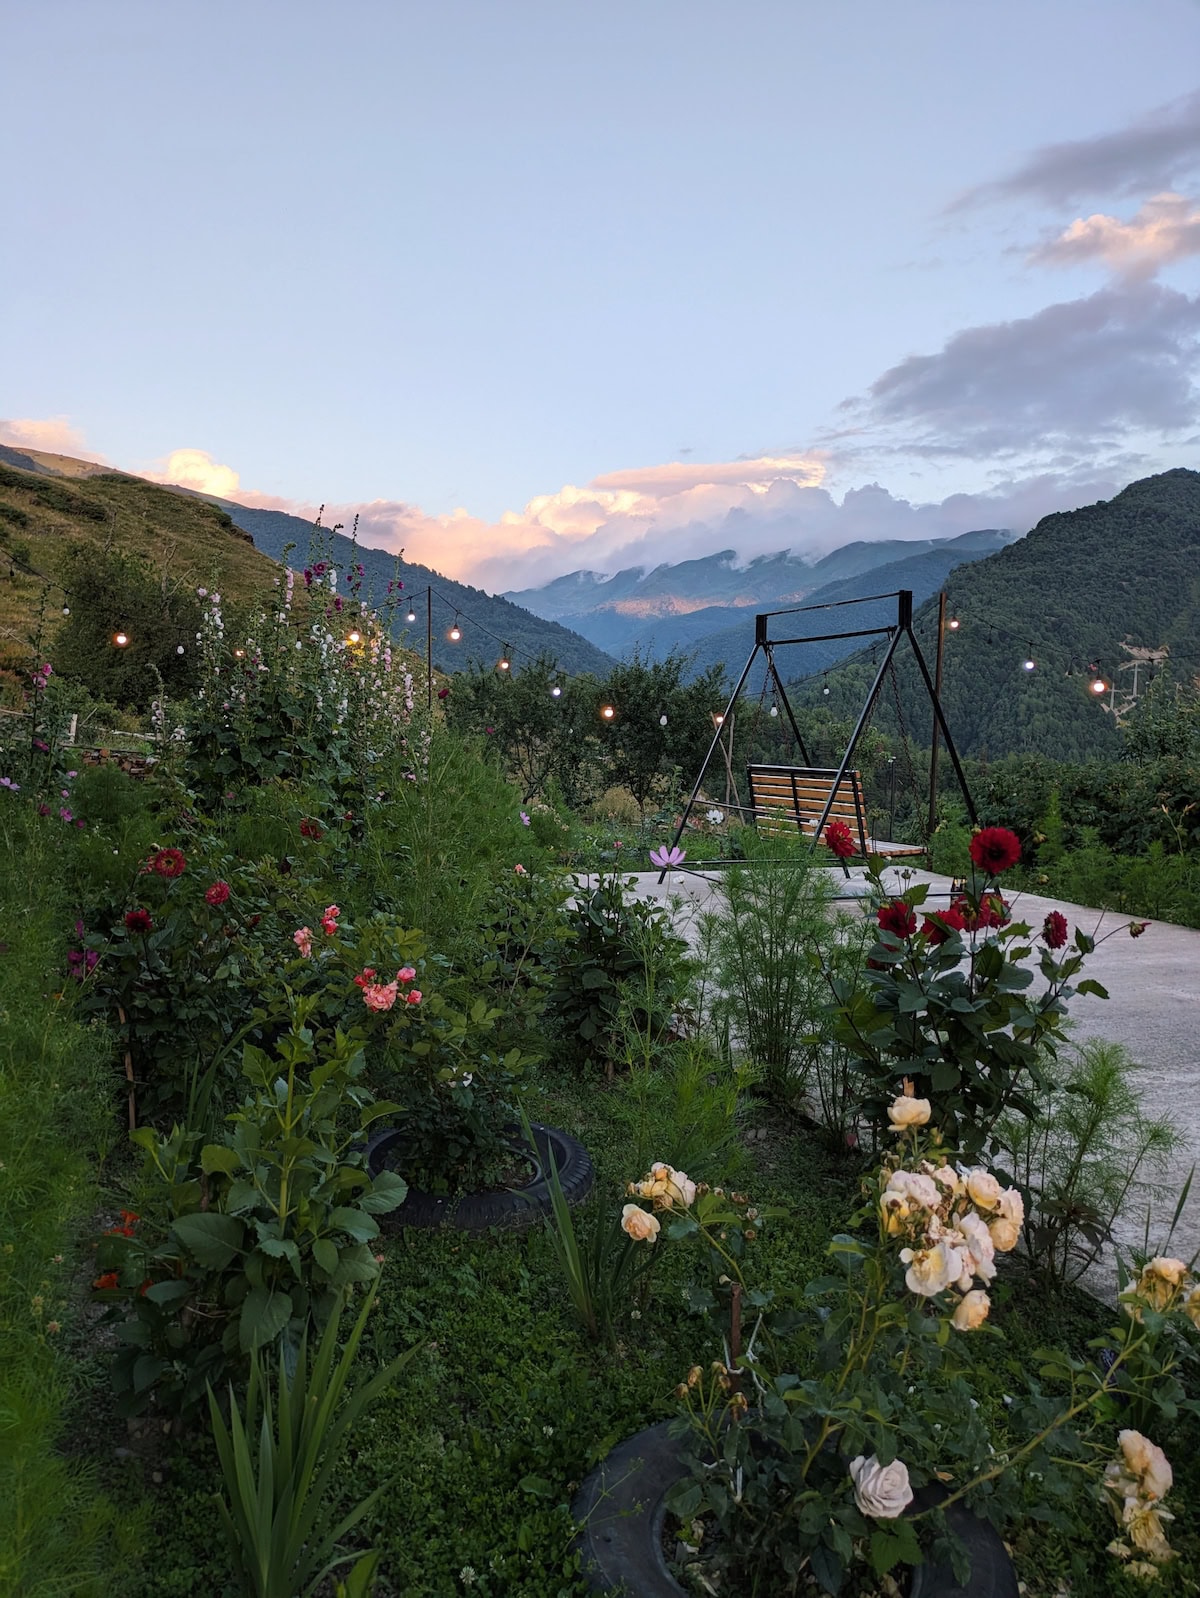
Guest House Betegi was by far the nicest stay. It was built in 2018 and feels modern and clean. Their flower garden is stunning as well. We had comfortable showers, warm rooms, good wifi, and a cute cat that paid us a visit. If there’s any guest house you can’t miss, it’s this one.
Day 4: Iprali to Ushguli
- Stats: 7.7mi/12.4km, 1950ft/590m gain, 1580ft/480m loss
- Accommodation: Back to Mestia’s Guesthouse Mountain View
Some people actually skip this day and take a taxi to Ushguli. The hike itself isn’t that exciting, but it’s an easier walk and we don’t regret doing it.
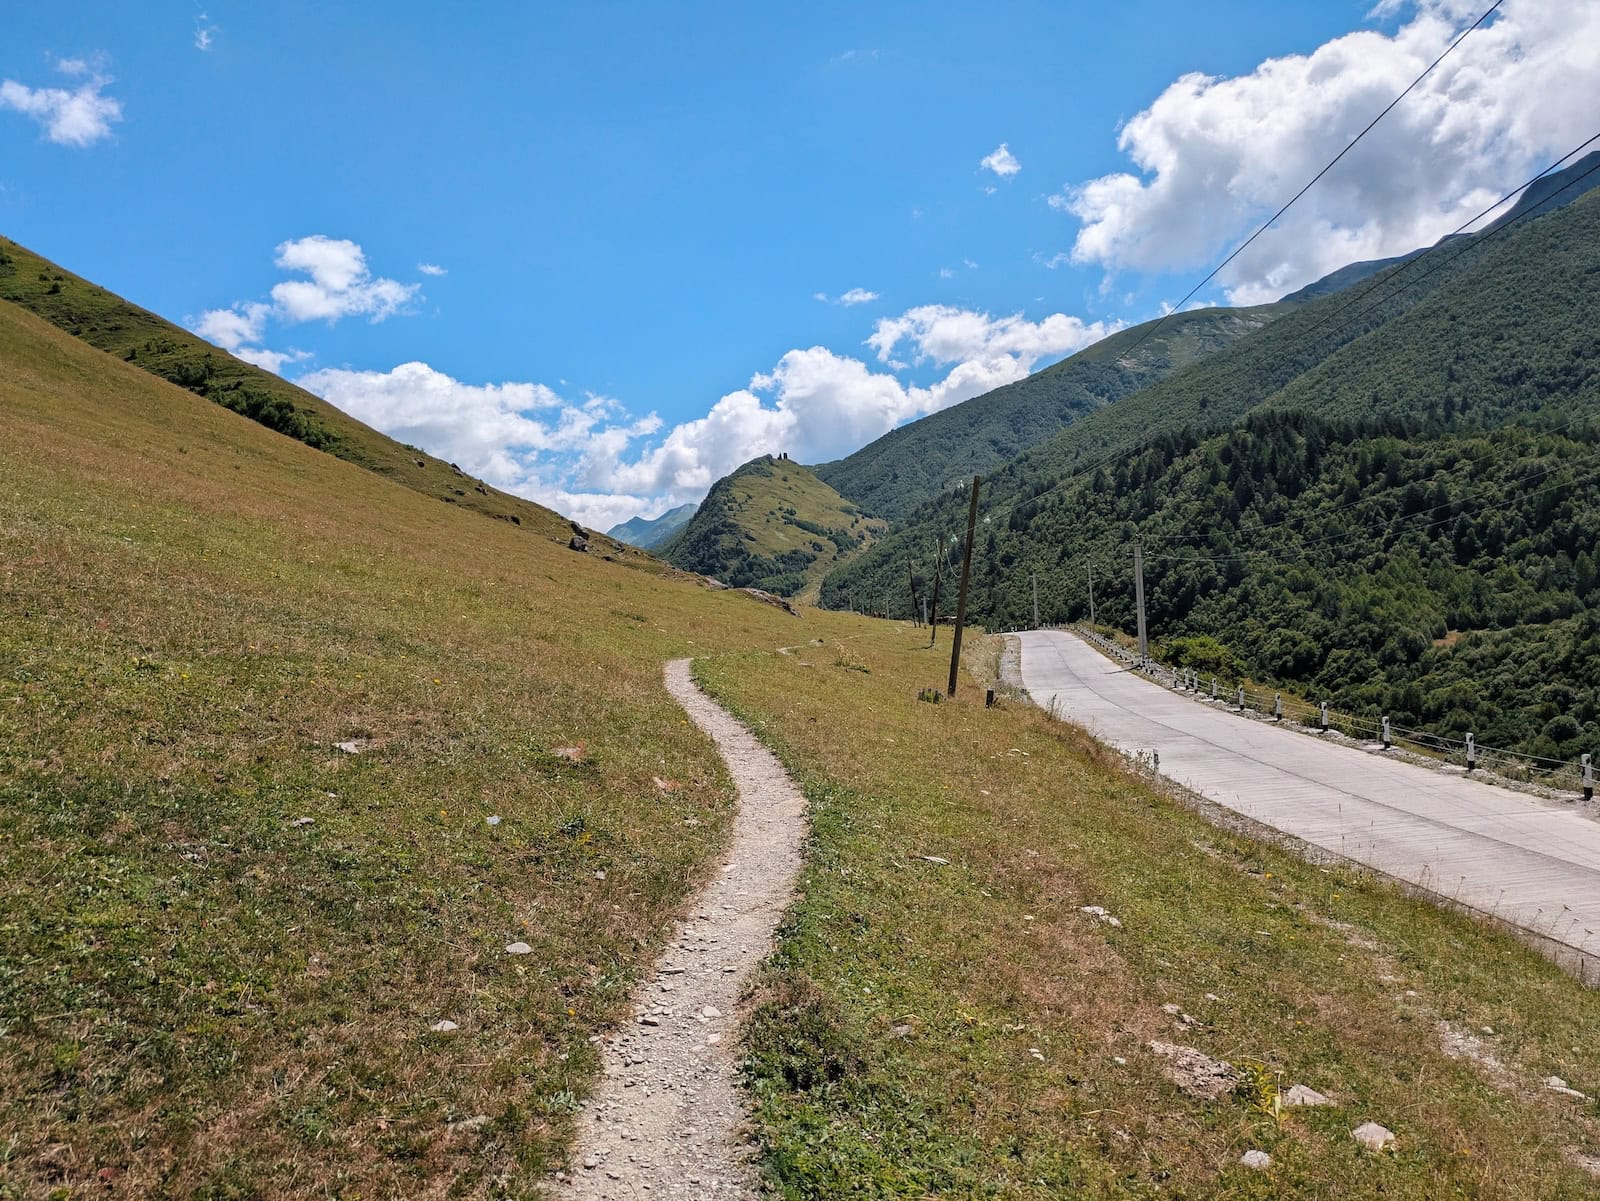
You descend from the guest house through the village to the road, and then climb again into the forest. Eventually, you make it back to the road that leads to Ushguli, and you walk alongside it in the fields.
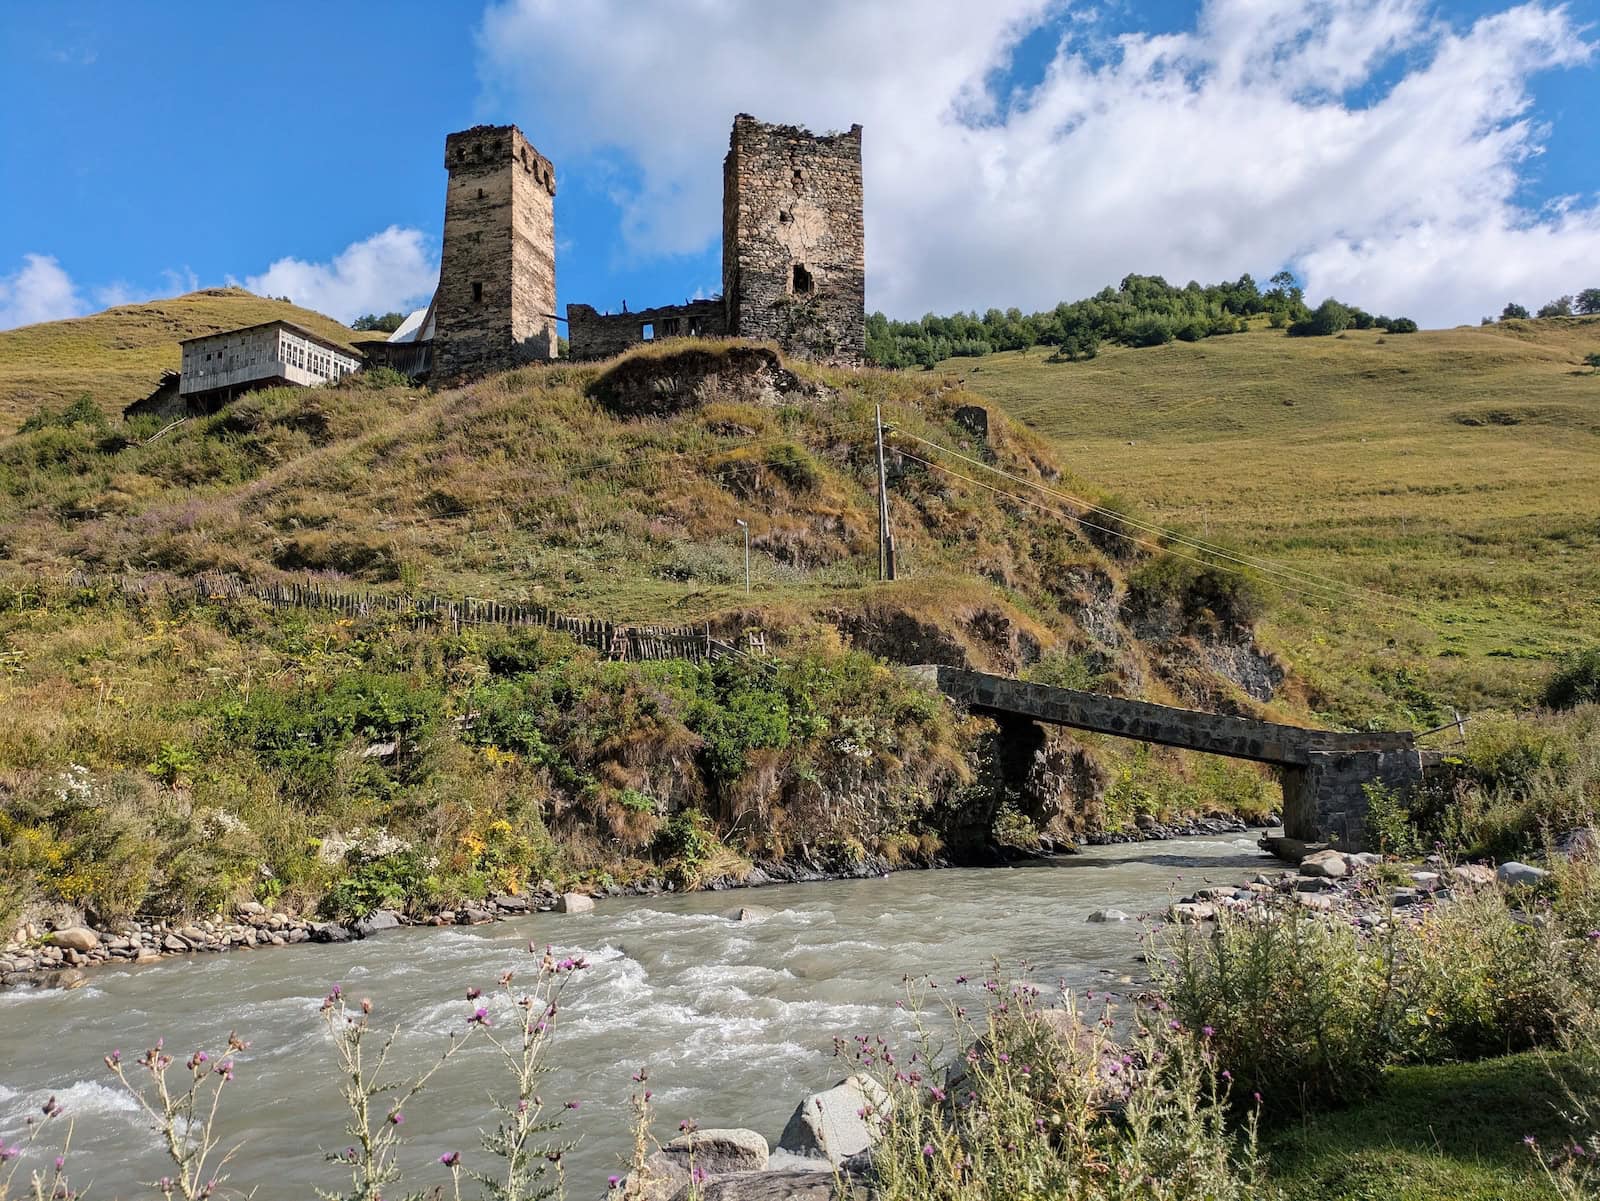
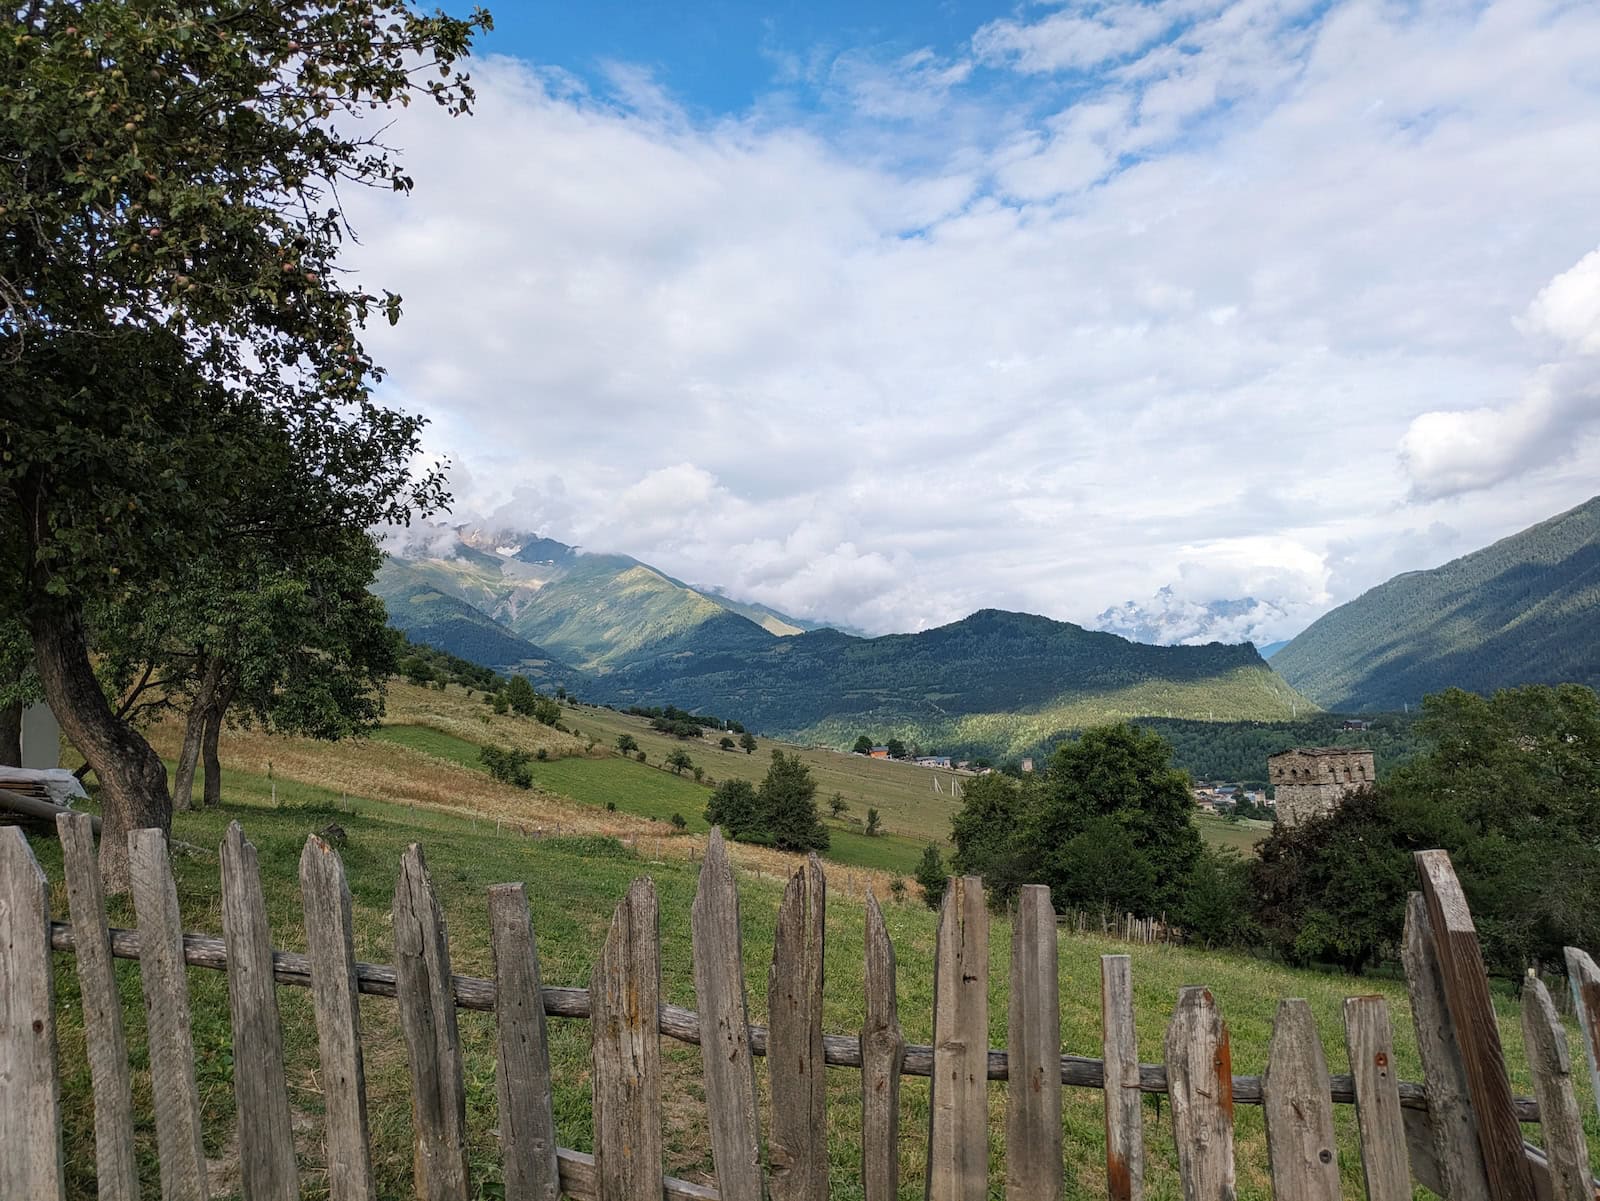
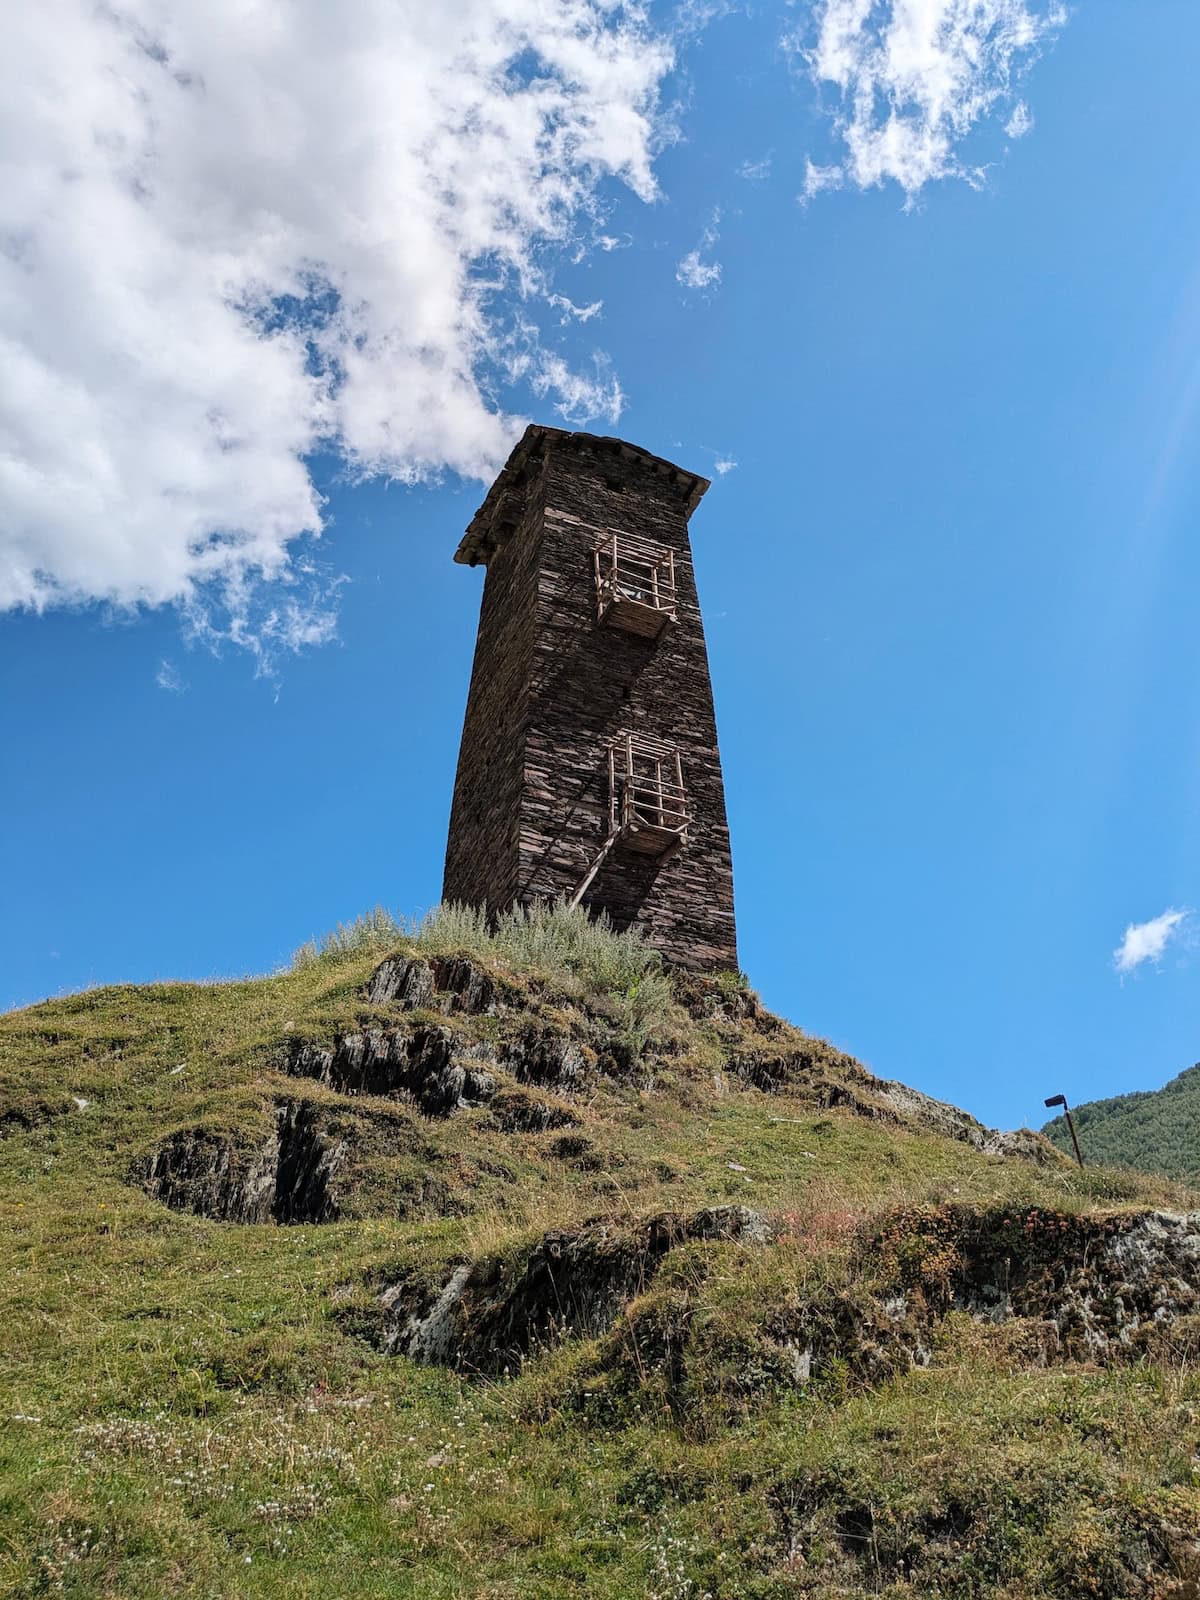
Finally, you arrive at Ushguli and are greeted by a cluster of medieval stone towers. There’s a cafe at the entrance of the village and we stopped for lemonade and pastries. We then climbed to the top of the highest stone tower for a lovely view of the village.

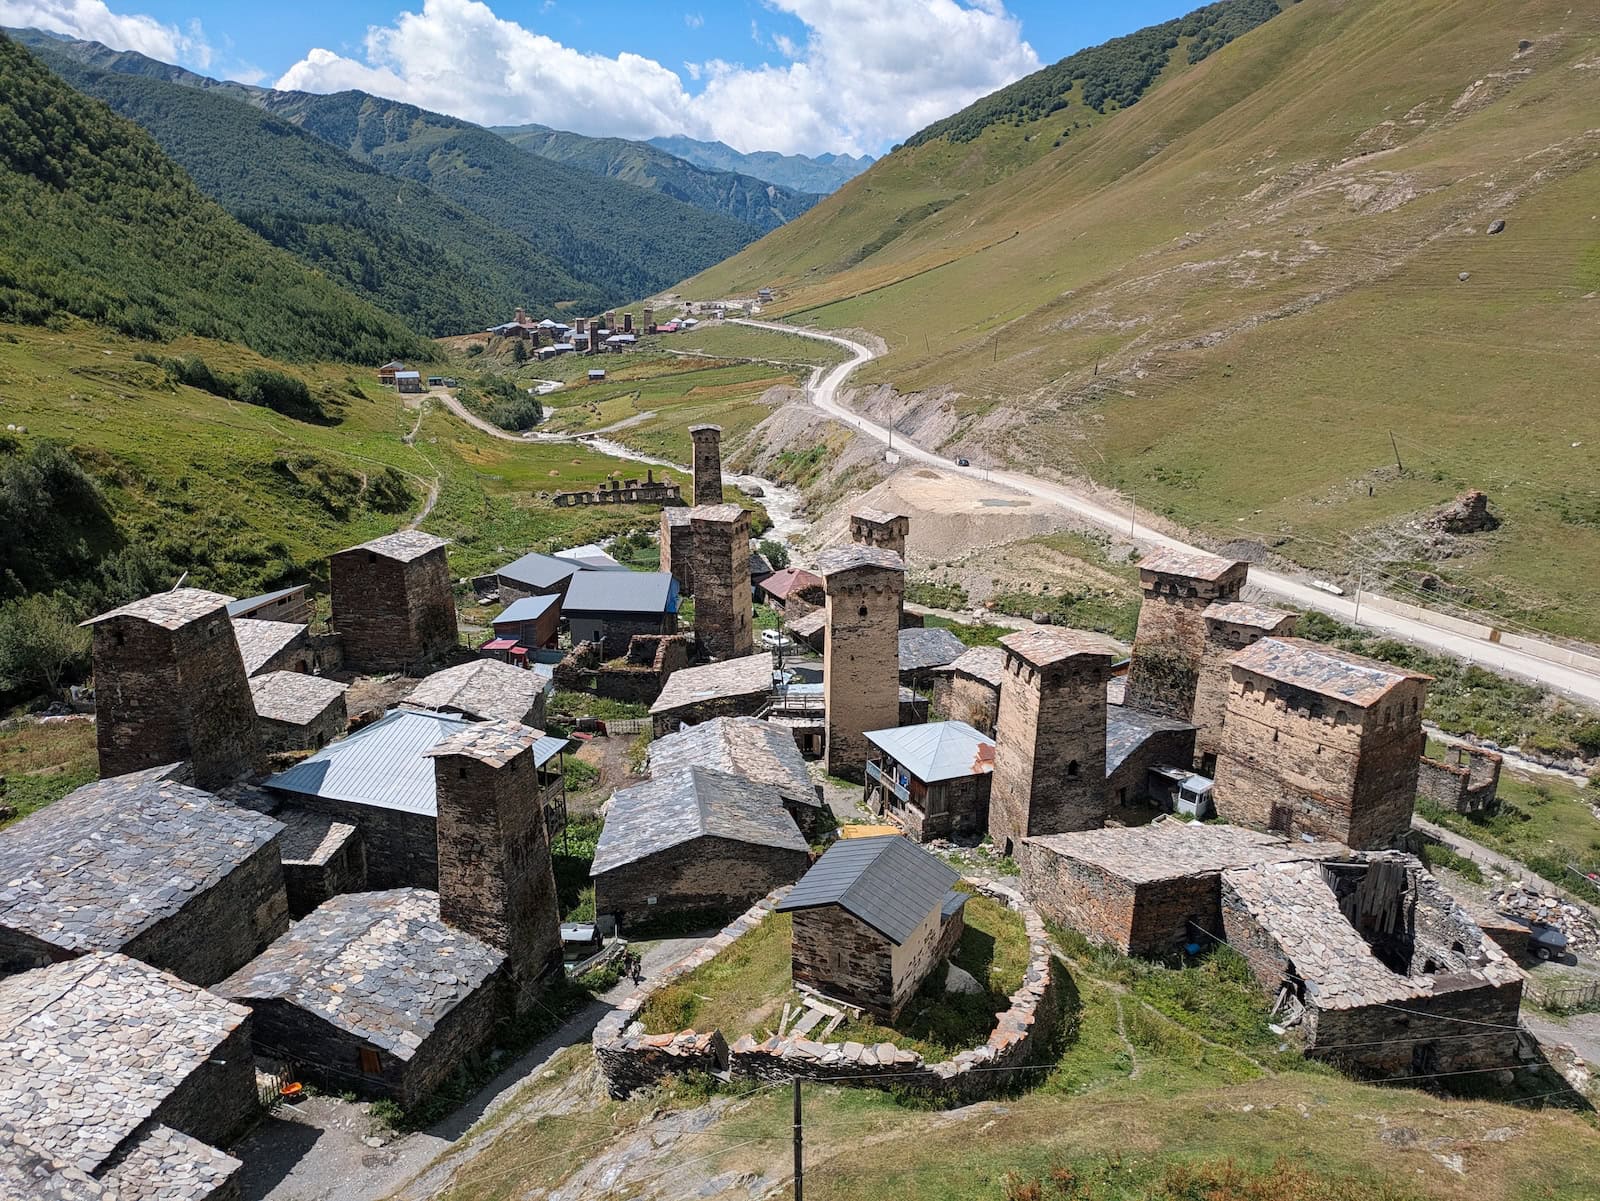
You can continue climbing to see more of the village, but we were tired and just waited for the community vans (marshrutkas) to fill up so we could leave. The marshrutkas typically cost 50 lari and wait right at the base of the village. You can also book them in advance, sometimes for closer to 40 lari, but they’re further up in the village.
Our driver honored our 40 lari fare since we’d planned to go with someone further up in the village. We had to wait an hour or so for the van to fill up, but the driver was very friendly and even pulled over and gave us homemade chacha (Georgian liquor) from his van when he heard us talking about it. The funniest part was that he didn’t even speak English but heard “chacha” specifically.
We arrived back to Mestia after only an hour and the trek was finished!
Mestia to Ushguli Packing List
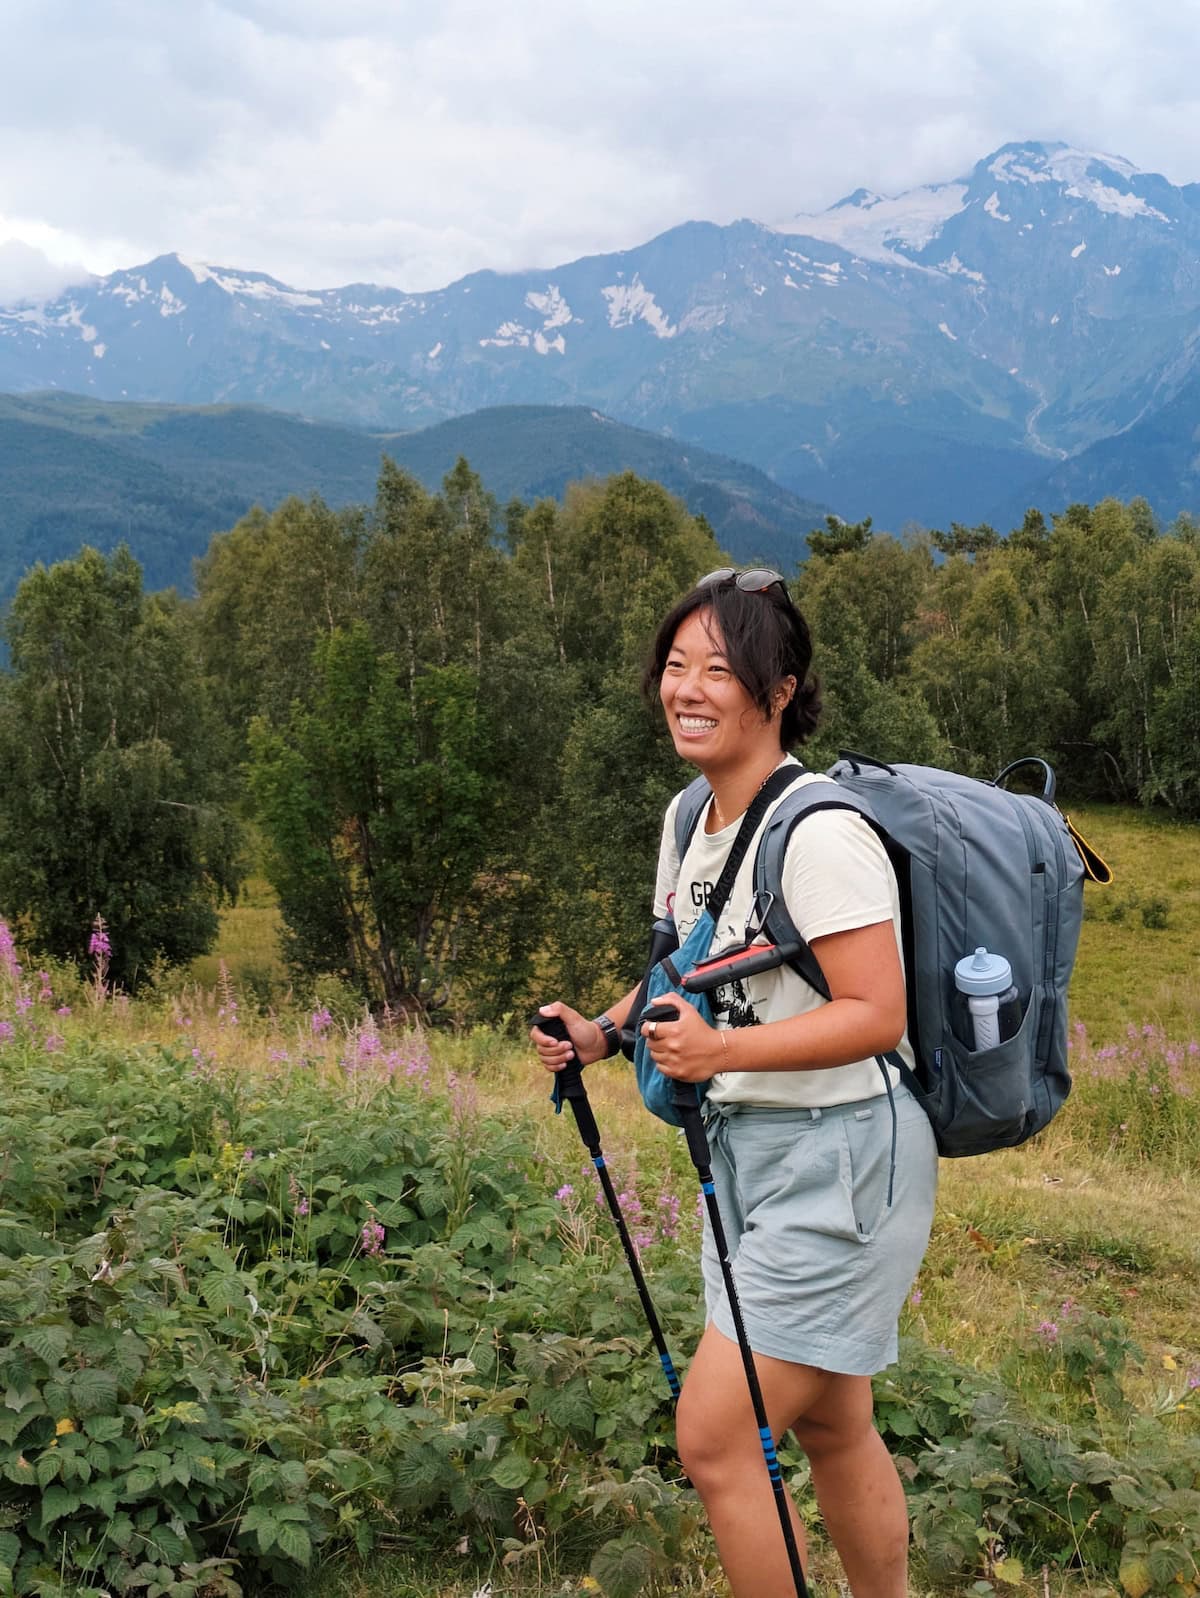
Hiking backpack—You can use any comfortable backpack with decent storage. I would recommend at least 30L. I used my 40L travel backpack (not even made for hiking) but I’d recommend the REI Flash 55 Pack or REI Trail 40 Pack. You don’t need this much storage for the trek, but they’re helpful as travel bags. I personally travel and trek with the Flash 55 Pack now.
Rain cover—To keep your belongings dry in your bag when it rains. This one fits 50-65L bags and this one fits 30-45L ones.
Hiking boots or trail shoes—I wore some lightweight Keen hiking books that are no longer sold. My friend wore trail runners. I would recommend the Merrell Moab Speed 2 since they’re lightweight but sturdy and can also be worn as chunky city shoes.
T-shirt and shorts (x2)—Bring one to wear and one to change into. If you don’t mind starting the day in a slightly-damp set, you could probably get away with just one each. For shorts, I’d recommend having big pockets or belt loops, as I used them to hold my squeeze bottle and navigation device. For t-shirts, look for something lightweight and quick-drying.
Base layer—A tech or merino wool layer will keep you warm in the evenings.
Joggers or leggings (x2)—Something to wear at night or during colder days. I brought one pair of warmer joggers and one pair of water repellent ones. I didn’t use the water repellent ones at all since it didn’t rain, but I’d recommend having 2 in case it does.
Fleece OR packable puffer—You don’t need both if you’re going in the summer. I wore an old puffer I had and it was fine, but if you need a rec, Patagonia or Cotopaxi have quality ones.
Rain jacket—A rain jacket is necessary since the weather in the mountains is unpredictable. I linked the one I personally use.
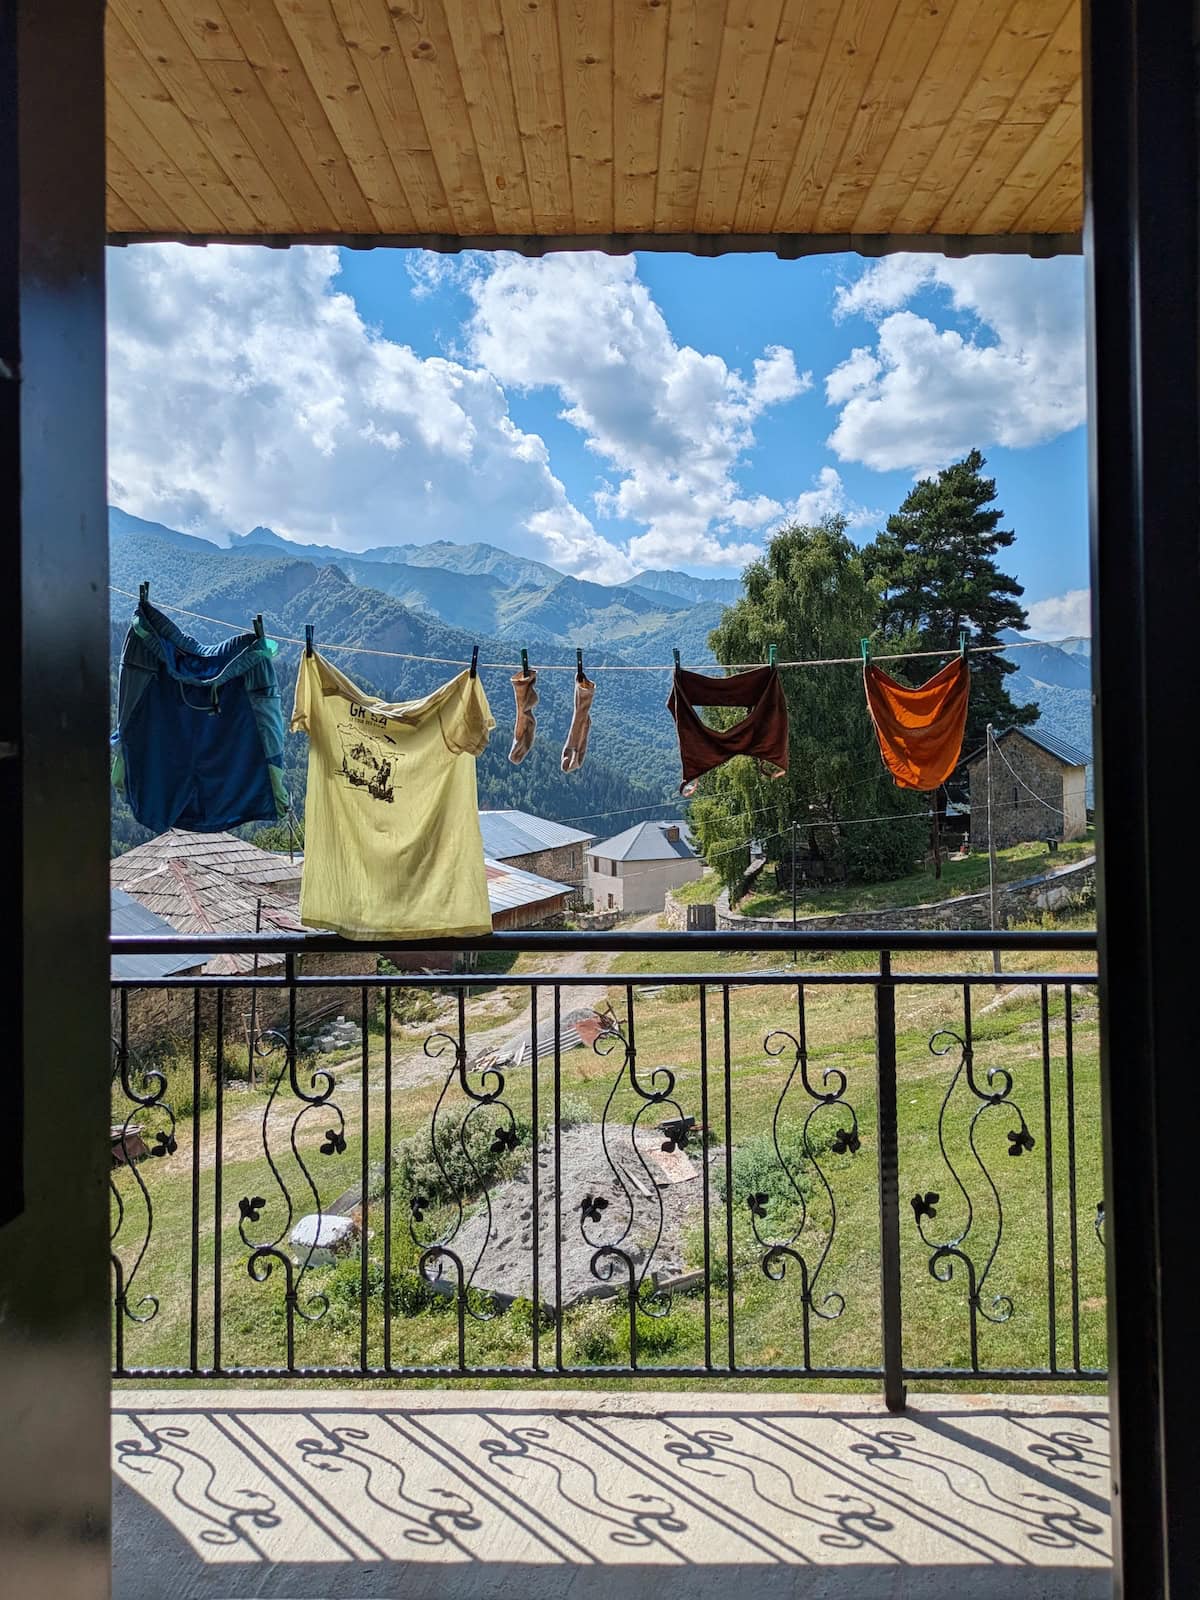
Undergarments (sports bra, underwear, socks)—Since this is a short trek, you can bring one for each day, or just two pairs and wash them in the sink to dry overnight. They were usually damp in the morning, but you can strap them to the outside of your bag and the sun will do the rest. I recommend merino wool for undergarments since it dries quickly, and for socks in particular, I picked Darn Tough since they have lifetime warranty.
Water filter—I carried a 1L water bottle with a filter and a smaller squeeze bottle. I have no complaints. We were able to fill up at streams each day, but there are some stretches without as many water sources, so always carry at least 1L with you.
Power bank—You’ll be able to charge your device at the guest houses, but you’ll want a backup power bank if your phone dies quickly.
Food—The guest houses have ample meals but could be better for vegetarians. I would recommend bringing some protein bars. You can get snacks each day but it’s important to have an emergency food stash. You’ll also need to take care of your lunch and we usually just took breakfast leftovers. If you’re vegan or gluten-free, I would recommend bringing your own food.
Cash—You pay for the guest houses in cash upon arrival. Make sure you bring enough as there are no ATMs during the trek. I would take 300 lari total per day for two people just to be safe.
Esim—There’s wifi at the guest houses, but you’ll want an eSim for service in-between. I use GigSky for my eSims and bought an unlimited data one so I wouldn’t have to worry about usage limites.
Navigation device—You can do this without a fancy watch or device, but they can still help when the trail isn’t clear (especially at the beginning for us). I downloaded the GPX tracks on my watch from Komoot; we followed that route except we stopped in Iprali on the third day and didn’t double back on the last day, instead taking the shorter route by the route to Ushguli. I had the COROS APEX 2 at the time, but would recommend the APEX 4 since it’s the most up-to-date version. (If you decide to get one, you can use my code COROS-Lily to get a free extra watch band). I love COROS because you don’t have to charge them that much. The watch lasted all day and could even go a second day.
Toiletries (toothbrush, toothpaste, floss, sunscreen)
Bathroom kit—While you can avoid peeing or pooping in the wild, it’s important to have a kit just in case. I recommend the Kula cloth for an antimicrobial reusable pee wipe, a lightweight hand shovel, a small roll of toilet paper, and hand sanitizer. I also got a bidet bottle cap but didn’t use it as much as I thought I would.
Medication—Remember your prescriptions and any first-aid meds you might need like ibuprofen and Neosporin.
Let me know if you have any questions, and happy trekking!

My son lives in Armenia and we will be traveling to Georgia in June as a group of 9. Wouldn’t guest houses accommodate that many people or are they only equipped to house a small group? Any other tips with a group of our size in mind?
How lovely! The biggest group I saw was ~5-6 for a whole family. You may want to book more in advance and you may also need to split up between a couple guesthouses if it comes to it. Otherwise I think it would be possible.
Hello, thank you for writing about your trek! Would you say it’s safe as a solo (asian, petite) female to do this hike? I’d feel less nervous if there were fellow hikers along the way/people to group up with from the guesthouses.
Was it also difficult getting to the starting point from Tbilisi?
Hi! Yes, we saw at least one solo woman and a lot of people do group together if they’re alone. It is a bit difficult to get to Mestia from Tbilisi – we did it in 2 days, taking the marshruktas from Tbilisi to Kutaisi and then Kutaisi to Mestia.
Hi Lily, did you use booking.com for the guesthouses and did this include meals already in the price or did you pay for the meals when you arrived?
Hi Gemma! Yes, we used Booking as many of the guesthouses are only on there. We didn’t have to pay in advance. The prices did not include the meals so we paid for everything upon arrival in cash
Hi Lily,
Thank you for the nice write up. I will be hiking in the area in the first part of July. I read that bugs could be a problem. Were there a lot of bugs on the trail?
Thank you in advance
Hi Yun! I actually didn’t think so during August. I got bit more by mosquitoes in Rome than I did on this trek.